A Naive Rust Tutorial
TOC | 目录
尽管 Rust 官方有非常详尽的资料,但是在很多人眼里,Rust 仍然是一门非常难以上手的语言。我最开始的时候也看过 The Book(The Rust Programming Language)的前几章,发现自己看不下去之后也把 rustlings 里面的 exercises 全部做了一遍,但是还是感觉难以下咽。
最后发现,(至少对于我来说)入门一门语言最好的方式是把自己实际的需求用这门语言去试一遍:在写了几个实用的脚本程序,用 Rust 去做了一门课的课程实验之后,我发现使用 Rust 根本没有那么难。
以下内容可能存在错误,欢迎指正。Rust 使用 2021 稳定版本。本文相关代码位于 https://github.com/taoky/naive-rust-examples。
相关文档与工具:
- The Book: https://doc.rust-lang.org/book/
- Rust by Example: https://doc.rust-lang.org/stable/rust-by-example/
- The Rust Standard Library: https://doc.rust-lang.org/std/index.html
- (非官方)Rust Cookbook: https://rust-lang-nursery.github.io/rust-cookbook/intro.html
- The Rustonomicon(黑魔法): https://doc.rust-lang.org/stable/nomicon/intro.html
- Rust Playground: https://play.rust-lang.org/
安装与配置
按照官网教程来就行,如果有网络问题的话去换源。
我用的编辑器是 VS Code,几个重要的配置:
- 配对的括号显示颜色(Editor › Bracket Pair Colorization: Enabled 和 Editor › Guides: Bracket Pairs 设置成 active)
- 扩展:rust-analyzer(Rust 官方那个不好用)。调试可以使用 CodeLLDB 扩展。
- GitHub Copilot(可选,补全 Rust 代码的质量也还行)
JetBrains 的 CLion + Rust 插件据说使用体验很好,但是需要收费(学生可以申请免费的教育版)。
简单的例子
你好,世界!
迈出的第一步
尽管 rustc 可以编译单个 rust 代码文件,但是一般来说代码会引入第三方的 crate,所以最好还是创建一个 project:
cargo new --bin helloworld
Tip:如果觉得这样很烦,可以安装 cargo-play,详情参见 https://github.com/fanzeyi/cargo-play。或者用 Rust Playground。
项目中有两个文件(编译前):
-
Cargo.toml:你的项目的名字、版本、依赖信息。
[package] name = "helloworld" version = "0.1.0" edition = "2021" # See more keys and their definitions at https://doc.rust-lang.org/cargo/reference/manifest.html [dependencies] -
src/main.rs:src 目录放源代码。main.rs 里面的
fn main()是程序的入口点。fn main() { println!("Hello, world!"); }
其中 println 是一个宏(macro),需要加 ! 调用。
但是为什么 println 是宏?别的语言的输出功能似乎都是函数。一个原因是 Rust 中的函数不支持可变参数,而 println 给用户的是可变参数的接口,这只能用宏来实现。
cargo new 默认创建的就是 Hello world 程序,使用以下命令执行:
cargo run  # 包含调试信息的未优化版本
cargo run --release  # 优化后的版本
编译之后会生成 target 目录(存放编译结果文件)和 Cargo.lock 文件(锁定依赖的版本)。
但是光是输出 Hello, world 没有意思,我们来加点功能:多语言支持,用户输入自己想看到的语言,然后程序输出对应语言版本的 Hello, world。
考虑最简单的实现,运行时程序输出一个菜单,用户输入数字选择语言。首先我们要解决的问题是:怎么得到用户输入?
搜索之后可以发现,我们需要从标准库的 io::stdin() 按行读取数据到字符串中:
let mut input = String::new();
std::io::stdin().read_line(&mut input);
这里要注意的是:
-
定义变量的时候,需要用
mut表明变量的内容是可变化的。这和 shadowing 不太一样:let x = 5; let x = 10;想象变量名是一个标签。
mut表明标签贴上的东西本身是可变化的;而 shadowing 的操作实际上是把标签从某个东西上撕下来,然后贴到另一个东西上,这不需要「这个东西」本身是可变的。 -
稍微对 Rust 有了解的人可能会迷惑
String和&str的区别,如果拿 C++ 做对比,Rust 的String就是std::string,而&str就像是std::string_view。str这个类型本身在实践中是没有意义的。&str可以指向内存中任意存在的合法字符串,而String是在堆上分配了一块空间给字符串内容。当然,两者是可以相互转换的。
&str到String可以用s.to_string(),s.to_owned(),String::from(s)和s.into()实现,而String到&str可以用s.to_str()或者&s实现。 -
&mut与 borrowing 相关。与其他语言不同的是,引用(Reference)也分为可变引用和不可变引用。函数定义时需要指定参数的类型是否为引用、是什么引用。这里,input在调用read_line()之后肯定要用到,并且read_line就是要修改input的内容,所以就要可变引用。这一套机制也是保障 Rust 安全性的关键。很多时候函数的参数都是引用,否则用户输入的变量在调用函数之后可能就无法使用了(因为被「移动」到了函数里面)。巧妙的地方是,销毁变量的标准库函数
std::mem::drop()就用到了这个特性:let s: String = "rubbish".to_string(); std::mem::drop(s); // 之后 s 就不能被使用了。 -
标准库没有提供直接把 stdin 输入类型转换成需要的类型(类似于
int x; cin >> x;)的接口。一方面这样设计看起来会很奇怪(实现Stdin这个 trait 的结构还需要自己实现一套类型转换),另一方面类型转换本身也可能出错,而 Rust 有更优雅的方式处理错误。
获得了 input 之后需要类型转换,这一部分内容可以在 Rust by Example 里搜到:
let choice: i32 = input.parse().unwrap();
-
你会发现这里的类型标注是必须的——通过这种方式,编译器知道应该用什么类型去调用
parse()。另一种写法是:let choice = input.parse::<i32>().unwrap();这两种写法都能让编译器推断出需要如何去 parse。
::<i32>这种写法被称为 “turbofish”(https://turbo.fish/),并不是没有人想要简化这个语法,但是相关尝试(RFC)在一小时内即宣告失败。 -
这里
parse()的返回值不是i32,而是Result<i32, ParseIntError>,要从Result里取出i32就必须去做错误处理。Result<i32, ParseIntError>代表里面的内容可能是Ok(i32)或者Err(ParseIntError)。Rust 通过这种方式在强迫你去做错误检查,以构建更加稳健的应用。最后的unwrap()会检查Result是Ok()还是Err(),如果是Err就让程序崩溃(Panic),否则取出Ok里面的数据。
最后判断输出的语言:
if choice == 0 {
    println!("Hello, world!");
} else if choice == 1 {
    println!("你好,世界!");
} else {
    println!("Unrecogized choice");
}
最后这个程序长这样:
fn main() {
    println!("0: English");
    println!("1: 中文");
    let mut input = String::new();
    std::io::stdin().read_line(&mut input);
    let choice: i32 = input.parse().unwrap();
    if choice == 0 {
        println!("Hello, world!");
    } else if choice == 1 {
        println!("你好,世界!");
    } else {
        println!("Unrecogized choice");
    }
}
但是运行有 warning,而且会崩溃:
$ cargo run
warning: unused `Result` that must be used
 --> src/main.rs:5:5
  |
5 |     std::io::stdin().read_line(&mut input);
  |     ^^^^^^^^^^^^^^^^^^^^^^^^^^^^^^^^^^^^^^^
  |
  = note: `#[warn(unused_must_use)]` on by default
  = note: this `Result` may be an `Err` variant, which should be handled

warning: `helloworld` (bin "helloworld") generated 1 warning
    Finished dev [unoptimized + debuginfo] target(s) in 0.06s
     Running `target/debug/helloworld`
0: English
1: 中文
0
thread 'main' panicked at 'called `Result::unwrap()` on an `Err` value: ParseIntError { kind: InvalidDigit }', src/main.rs:6:37
note: run with `RUST_BACKTRACE=1` environment variable to display a backtrace
崩溃的原因很容易发现:input 中包含了我们输入的数字和换行符,parse() 不会容忍这样的问题(与 C 的 atoi() 不同)。把换行符 trim 掉就行:
let input = input.trim();
之后程序可以正常运行,但是 warning 也是不能忽视的。这条 warning 代表 read_line 返回的 Result (代表这个函数可能执行出错)没有被检查,加上 unwrap() 可以暂时解决这个问题:
std::io::stdin().read_line(&mut input).unwrap();
最后程序可以运行,但是不够优雅:
- 发生错误的时候能不能有更友好的提示,而不是甩出一坨 panic 错误信息?
- 如果要添加(很多)语言的时候怎么办?现在的逻辑似乎不够优雅。
简单的错误处理
对于第一个问题,在 unwrap 的文档(如果在用 VS Code,鼠标移到上面也能看到)中有直接的说明:
Because this function may panic, its use is generally discouraged. Instead, prefer to use pattern matching and handle the Err case explicitly, or call [unwrap_or], [unwrap_or_else], or [unwrap_or_default].
Pattern matching 的一种形式是用 match,看起来像是 switch-case,但是语法更强大一些:
match std::io::stdin().read_line(&mut input) {
    Err(e) => eprintln!("Error reading line: {}", e),  // 这里变量 e 就是 Err() 里面包裹的内容
    _ => {}  // 不与其他任何规则匹配时执行这一条规则
}
(eprintln! 将错误输出到 stderr)
这种 pattern matching 的形式也被其他语言借鉴,比如说 Python 3.10 的 match:
def http_error(status):
    match status:
        case 400:
            return "Bad request"
        case 404:
            return "Not found"
        case 418:
            return "I'm a teapot"
        case _:
            return "Something's wrong with the internet"
但是这样还是有点繁琐。使用 cargo clippy 检查项目风格的时候 clippy 也会跟你抱怨:
$ cargo clippy
    Checking helloworld v0.1.0 (/path/to/naive-rust-examples/helloworld)
warning: you seem to be trying to use `match` for destructuring a single pattern. Consider using `if let`
 --> src/main.rs:5:5
  |
5 | /     match std::io::stdin().read_line(&mut input) {
6 | |         Err(e) => eprintln!("Error reading line: {}", e),
7 | |         _ => {}
8 | |     }
  | |_____^ help: try this: `if let Err(e) = std::io::stdin().read_line(&mut input) { eprintln!("Error reading line: {}", e) }`
  |
  = note: `#[warn(clippy::single_match)]` on by default
  = help: for further information visit https://rust-lang.github.io/rust-clippy/master/index.html#single_match

warning: `helloworld` (bin "helloworld") generated 1 warning
    Finished dev [unoptimized + debuginfo] target(s) in 0.80s
所以更好的方法是用 if-let 语法:
if let Err(e) = std::io::stdin().read_line(&mut input) {
    eprintln!("Error reading line: {}", e)
}
文档中还提到的几个 unwrap 的变形,可以用来在出错时给变量设置一个「默认值」
let choice: i32 = input.parse().unwrap_or(0);  // 若出错,则返回 0
let choice: i32 = input.parse().unwrap_or_else(|_| {0});  // 若出错,则执行参数里的这个函数(闭包/lambda),这里这个闭包接受一个不会用到的值,直接返回 0
let choice: i32 = input.parse().unwrap_or_default();  // 若出错,返回这个类型的默认值。对于 i32 而言,默认值就是 0
或者有的时候,还是希望它能直接 panic,只是你不喜欢默认的错误信息,那就 expect():
std::io::stdin().read_line(&mut input).expect("Error reading line");
枚举类型与 trait
接下来解决第二个问题。Rust 中的枚举类型可以帮到我们:
enum Language {
    English,
    Chinese,
}
于是最后的 if-else 似乎可以改成更加直观的 pattern matching 了(直接用 i32 当然也能改,但是看起来会有点奇怪)。直接写的话就像这样子:
// 编译不通过!
match choice {
    Language::English => println!("Hello, world!"),
    Language::Chinese => println!("你好,世界!"),
    _ => println!("Unrecogized choice"),
}
但是别忘了 choice 是 i32,而我们的枚举类型是 Language,两者不匹配。Rust 标准库里目前没有将数字转换成 enum 的方式,要么用第三方的 crate 包,要么用 unsafe 的 transmute 来「强制类型转换」,要么还是要自己手写整数转换成 enum 的方法。这里选择最后一种方式。
这个逻辑可以这样写:
let choice = match choice {
    0 => Some(Language::English),
    1 => Some(Language::Chinese),
    _ => None,
};

match choice {
    Some(Language::English) => println!("Hello, world!"),
    Some(Language::Chinese) => println!("你好,世界!"),
    None => println!("Unrecogized choice"),
}
这里新的 choice 的类型是 Option<Language>。 Option 和 Result 类似:Result 表示操作是否成功,而 Option 表示值是否为空。里面可能是 Some() 或者 None。(在 Language 这个 enum 里面加个 Others 也可以,就不需要 Option 了)。
但是是否可以做得更好?比如说,让这个转换变成 Language 这个 enum 的一个方法?参考 https://stackoverflow.com/a/57578431,我们可以给 Language 实现 TryFrom trait,然后 choice.try_into() 就能进行转换:
impl TryFrom<i32> for Language {
    type Error = ();

    fn try_from(value: i32) -> Result<Self, Self::Error> {
        match value {
            0 => Ok(Language::English),
            1 => Ok(Language::Chinese),
            _ => Err(()),
        }
    }
}

// ...

match choice.try_into() {
    Ok(Language::English) => println!("Hello, world!"),
    Ok(Language::Chinese) => println!("你好,世界!"),
    Err(_) => println!("Unrecogized choice"),
}
-
Rust 中没有面向对象的继承,对应的,类似的功能由 trait 机制实现。Trait 定义了一些需要实现的函数,用户通过
impl <trait> for <struct>的语法实现这些功能。可以看一下标准库里TryFromtrait 的代码:pub trait TryFrom<T>: Sized { /// The type returned in the event of a conversion error. #[stable(feature = "try_from", since = "1.34.0")] type Error; /// Performs the conversion. #[stable(feature = "try_from", since = "1.34.0")] fn try_from(value: T) -> Result<Self, Self::Error>; } - 这里
Err中包裹的类型是(),因为我们不需要里面的内容。对应返回错误的时候的值就是Err(())。 - 为什么
try_into知道我们要从i32转换成Result<Language, _>?因为choice是i32,match里的值类型是Result<Language, _>,Rust 可以推断出这些信息。 - 既然有
try_into(),如果转换不会出错的话有没有into()?没错,对应的转换 trait 就是From。 -
最后一个问题:为什么给
Language实现TryFrom<i32>之后就能在i32身上用try_into()了?参考文档,因为TryIntotrait 是i32的 blanket implementation(指适用于所有类型的 trait 实现),它的定义是:impl<T, U> const TryInto<U> for T where U: ~const TryFrom<T>所以
Language实现了TryFrom<i32>之后,U = Language, T = i32,T 的TryInto<U>也就有实现了。
使用 TryFrom 的另一个好处是,可以为其他的类型实现转换,比如说字符串:
impl TryFrom<&str> for Language {
    type Error = ();

    fn try_from(value: &str) -> Result<Self, Self::Error> {
        match value {
            "en" => Ok(Language::English),
            "zh" => Ok(Language::Chinese),
            _ => Err(()),
        }
    }
}
在结束本小段之前,一句题外话:Result 和 Option 事实上也是枚举类型:
pub enum Result<T, E> {
    /// Contains the success value
    #[lang = "Ok"]
    #[stable(feature = "rust1", since = "1.0.0")]
    Ok(#[stable(feature = "rust1", since = "1.0.0")] T),

    /// Contains the error value
    #[lang = "Err"]
    #[stable(feature = "rust1", since = "1.0.0")]
    Err(#[stable(feature = "rust1", since = "1.0.0")] E),
}

pub enum Option<T> {
    /// No value
    #[lang = "None"]
    #[stable(feature = "rust1", since = "1.0.0")]
    None,
    /// Some value `T`
    #[lang = "Some"]
    #[stable(feature = "rust1", since = "1.0.0")]
    Some(#[stable(feature = "rust1", since = "1.0.0")] T),
}
数组、Vector、派生(derive)与结构体
现在我们的代码长成这样:
enum Language {
    English,
    Chinese,
}

impl TryFrom<i32> for Language {
    type Error = ();

    fn try_from(value: i32) -> Result<Self, Self::Error> {
        match value {
            0 => Ok(Language::English),
            1 => Ok(Language::Chinese),
            _ => Err(()),
        }
    }
}

fn main() {
    println!("0: English");
    println!("1: 中文");
    let mut input = String::new();
    std::io::stdin()
        .read_line(&mut input)
        .expect("Error reading line");
    let input = input.trim();
    let choice: i32 = input.parse().expect("Not an integer");

    match choice.try_into() {
        Ok(Language::English) => println!("Hello, world!"),
        Ok(Language::Chinese) => println!("你好,世界!"),
        Err(_) => println!("Unrecogized choice"),
    }
}
尽管前面做了很多修改,但是现在如果要添加一门新语言,还要修改四个地方:enum、TryFrom 实现、main() 开头的 println! 和最后的 match,甚至比原来还要麻烦。考虑添加一个数组 metadata,每一项中存放某门语言对应的 enum、开头要显示的语言名称,和最后 hello world 的文字。
Rust 中的数组长度固定,最简单的代码不难写:
const METADATA: [(Language, &str, &str); 2] = [
    (Language::English, "English", "Hello, world!"),
    (Language::Chinese, "中文", "你好,世界!")
];
- 常量
const变量名需要大写(否则有 warning),并且需要写明类型。 - 数组的类型是
[元素类型; 长度]。这里的元素是一个有三项的 tuple。
main 中对应的代码就可以改成:
fn main() {
    for (key, value) in METADATA.iter().enumerate() {
        println!("{}: {}", key, value.1);
    }
    let mut input = String::new();
    std::io::stdin()
        .read_line(&mut input)
        .expect("Error reading line");
    let input = input.trim();
    let choice: usize = input.parse().expect("Not an integer");

    if choice < METADATA.len() {
        println!("{}", METADATA[choice].2);
    } else {
        println!("Invalid choice");
    }
}
-
对于一个可迭代的值,最简单的循环写法是:
for i in METADATA {
    // ...
}
它等价于:
for i in METADATA.into_iter() { // i 类型为 (Language, &str, &str) // ... }METADATA.into_iter()是一个迭代器(iterator)。而上面代码里的iter()也是迭代器,但是每次返回的类型不同:使i成为一个不可变的引用,iter_mut()对应则是可变引用。PS:
into_iter()不一定会转移变量的 ownership。for i in METADATA.iter() { // i 类型为 &(Language, &str, &str) // ... } for i in METADATA.iter_mut() { // i 类型为 &mut (Language, &str, &str) // ... }这里的 enumerate 同时返回了当前迭代次数(即数组的 index)和数组中对应的值,是
Iterator这个 trait 的一个方法。 - 引用 tuple 中某一项的值的语法是
tuple.index,如代码中的value.1。 -
可以注意到,数组 index 的类型必须是
usize。和很多设计正常的语言一样,index 不能是负数。(C/C++ 的array[index]其实是指针*(array + index)的语法糖,所以index可以是负数,甚至可以index[array])usize 的大小和机器的位长相关。
用的时候如果是其他类型,可以进行类型转换:
METADATA[choice as usize] -
如果数组的 index 超出范围,会在运行时 panic。Rust 编译器无法检测这样的错误:
// if choice < METADATA.len() {
//     println!("{}", METADATA[choice].2);
// } else {
//     println!("Invalid choice");
// }
println!("{}", METADATA[choice].2);
$ cargo run Compiling helloworld v0.1.0 (/path/to/naive-rust-examples/helloworld) Finished dev [unoptimized + debuginfo] target(s) in 1.39s Running `target/debug/helloworld` 0: English 1: 中文 3 thread 'main' panicked at 'index out of bounds: the len is 2 but the index is 3', src/main.rs:39:20 note: run with `RUST_BACKTRACE=1` environment variable to display a backtrace(没有 warning 哦!)
现在还有两个问题:
- 数组的长度要在定义的时候硬编码(虽然长度不对会编译错误)。
- Tuple 会让人对每一项的内容感到迷惑,之后要改顺序之类的也要改后面一堆代码,换成结构体会不会更好?
关于问题一,可以试试把数组换成 vector:
// 编译不通过!
const METADATA: Vec<(Language, &str, &str)> = [
    (Language::English, "English", "Hello, world!"),
    (Language::Chinese, "中文", "你好,世界!")
];
$ cargo run
   Compiling helloworld v0.1.0 (/path/to/naive-rust-examples/helloworld)
error[E0308]: mismatched types
 --> src/main.rs:6:47
  |
6 |   const METADATA: Vec<(Language, &str, &str)> = [
  |  _______________________________________________^
7 | |     (Language::English, "English", "Hello, world!"),
8 | |     (Language::Chinese, "中文", "你好,世界!")
9 | | ];
  | | ^- help: try using a conversion method: `.to_vec()`
  | |_|
  |   expected struct `Vec`, found array of 2 elements
  |
  = note: expected struct `Vec<(Language, &'static str, &'static str)>`
              found array `[(Language, &str, &str); 2]`

For more information about this error, try `rustc --explain E0308`.
error: could not compile `helloworld` due to previous error
行行行,数组和 vector 不是同一个类型,那我加个 .to_vec() 总行了吧:
$ cargo run
   Compiling helloworld v0.1.0 (/path/to/naive-rust-examples/helloworld)
error[E0277]: the trait bound `Language: Clone` is not satisfied in `(Language, &str, &str)`
 --> src/main.rs:9:3
  |
9 | ].to_vec();
  |   ^^^^^^ within `(Language, &str, &str)`, the trait `Clone` is not implemented for `Language`
  |
  = note: required because it appears within the type `(Language, &str, &str)`

For more information about this error, try `rustc --explain E0277`.
error: could not compile `helloworld` due to previous error
这里的错误代表我们的 Language 枚举类型没有实现 Clone 这个 trait。难道需要我们手动实现吗?不需要,只需要用 derive 语法让 rust 给我们一个默认的实现就行:
#[derive(Clone)]
enum Language {
    English,
    Chinese,
}
-
Clone的意思是这个类型结构允许显式的复制。它或许会需要很高的代价(比如说字符串的 clone,不仅要复制指向内容的指针、字符串长度等结构体本身的结构,还要复制结构体中指针指向的字符串实际内容)。对应Copytrait 代表只需要简单memcpy结构体/值本身就行。let s: String = "naive!".to_string(); let x = s.clone(); // 显式复制(Clone),之后 x 和 s 就是两个没关系的变量了。 let y = s; // 「移动」语义,因为 String 不是简单结构,没有 Copy trait,所以 s 就「移动」到了 y,s 之后就无法使用了。 // let z = s; // 编译错误! let x: i32 = 1; let y = x; // 因为 i32 是简单的类型,实现了 Copy trait,所以此时发生了隐式的复制(Copy),y 和 x 值都是 1 let z = x; // 可以编译 let zz = x.clone(); // 当然,实现了 Copy 就必然实现了 Clone -
另一个很常用的 trait 是
Debug,启用这个 trait 之后就可以方便输出它的值。#[derive(Clone, Debug)] enum Language { English, Chinese, } fn main() { let x = Language::English; // println!("{}", x); // 编译错误! println!("{:?}", x); }执行后输出
English。
但是很遗憾,const 中不能出现这样的函数:
$ cargo run
   Compiling helloworld v0.1.0 (/path/to/naive-rust-examples/helloworld)
error[E0015]: calls in constants are limited to constant functions, tuple structs and tuple variants
  --> src/main.rs:7:47
   |
7  |   const METADATA: Vec<(Language, &str, &str)> = [
   |  _______________________________________________^
8  | |     (Language::English, "English", "Hello, world!"),
9  | |     (Language::Chinese, "中文", "你好,世界!")
10 | | ].to_vec();
   | |__________^

For more information about this error, try `rustc --explain E0015`.
error: could not compile `helloworld` due to previous error
尽管这个问题可以被一些方法绕过(比如说使用 lazy_static 这个第三方 crate),但是对于 const 来说,可能还是数组更好一些。
关于问题二,让我们定义一个结构体:
struct LangMeta {
    lang: Language,
    name: String,
    greeting: String,
}
然后 METADATA 就可以这么定义:
// 编译不通过!
const METADATA: [LangMeta; 2] = [
    LangMeta {
        lang: Language::English,
        name: "English",
        greeting: "Hello, world!",
    },
    LangMeta {
        lang: Language::Chinese,
        name: "中文",
        greeting: "你好,世界!",
    },
];
这里会发现字符串需要从 &str 转换成 String。可以字符串后面都加上 .to_string(),但是为什么不能直接改结构体定义呢?因为已知数据在运行时都不会变化,&str 似乎可行:
// 编译不通过!
struct LangMeta {
    lang: Language,
    name: &str,
    greeting: &str,
}
但是编译器会要求加上 lifetime parameter,因为这些字符串的所有者不是 LangMeta,它不知道这里引用的字符串值是否会突然消失(别忘了,这里我们没有引用计数 & GC!)
最简单的方法是直接告诉它,这个字符串在整个程序运行的周期里都有效,对应的 lifetime 参数是 static:
struct LangMeta {
    lang: Language,
    name: &'static str,
    greeting: &'static str,
}
最后的代码类似于这样,甚至可以再加几门语言:
#[derive(Clone, Debug)]
enum Language {
    English,
    Chinese,
    Japanese,
    Esperanto,
}

struct LangMeta {
    // enum 没有用到,但是还是留着
    // 使用以下的语法可以 suppress warning
    #[allow(dead_code)]
    lang: Language,
    name: &'static str,
    greeting: &'static str,
}

const METADATA: [LangMeta; 4] = [
    LangMeta {
        lang: Language::English,
        name: "English",
        greeting: "Hello, world!",
    },
    LangMeta {
        lang: Language::Chinese,
        name: "中文",
        greeting: "你好,世界!",
    },
    LangMeta {
        lang: Language::Japanese,
        name: "日本語",
        greeting: "こんにちは、世界!",
    },
    LangMeta {
        lang: Language::Esperanto,
        name: "Esperanto",
        greeting: "Saluton, mondo!",
    },
];

fn main() {
    for (key, value) in METADATA.iter().enumerate() {
        println!("{}: {}", key, value.name);
    }
    let mut input = String::new();
    std::io::stdin()
        .read_line(&mut input)
        .expect("Error reading line");
    let input = input.trim();
    let choice: usize = input.parse().expect("Not an integer");

    if choice < METADATA.len() {
        println!("{}", METADATA[choice].greeting);
    } else {
        println!("Invalid choice");
    }
}
Ports 文件列表解析
今年寒假的时候我和其他同学对 Linux 101 做了比较大幅度的修订,加了不少东西,包括最后一章中的这道题目:
Shell 文本处理工具练习 3:文件列表解析
Ports 是 BSD 系列操作系统管理编译软件的方式。下面我们将介绍 FreeBSD 操作系统中的 ports 目录结构。
Ports 目录的第一层为不同软件的分类(诸如音频程序、数据库程序会分别放置在 audio 和 databases 目录下),第二层则为各个软件的目录。在绝大多数软件的目录下都有
distinfo文件,用于描述其依赖的源代码包文件的名称、大小和 SHA256 校验值信息。例如,
gcc10软件包的distinfo位于lang/gcc10/distinfo,内容类似如下:
TIMESTAMP = 1619249722 SHA256 (gcc-10.3.0.tar.xz) = 64f404c1a650f27fc33da242e1f2df54952e3963a49e06e73f6940f3223ac344 SIZE (gcc-10.3.0.tar.xz) = 76692288你的任务是:搜索 ports 中的所有 distinfo,提取所有文件名和 SHA256,按照文件名以字典序排序并输出,每行格式要求如下:
64f404c1a650f27fc33da242e1f2df54952e3963a49e06e73f6940f3223ac344 gcc-10.3.0.tar.xz现实中的 ports 文件可以从 https://mirrors.ustc.edu.cn/freebsd-ports/ports.tar.gz 下载解压得到。
注意:少量
distinfo文件的 SHA256 对应行最后会有多余的空格或制表符,需要妥善处理。
这个问题实际上是镜像站同步 FreeBSD ports 的脚本中的一步(包括最后的「注意」,事实上是前几个月我修的把同步下来的文件全删了的大 bug)。当然,同步脚本是用 Shell 写的,但是这里我们用 Rust 来做吧。
使用第三方包
Rust 的标准库相比于 Python 这种来说,功能少得多——Python 更倾向于 battery-included,而 Rust 更倾向于让第三方 crate 包做专业的事情,包括生成随机数(crate rand,快速生成可靠的随机数不是一件容易事!)、以及正则表达式(crate regex)。
Rust 添加依赖的方式非常简单粗暴,编辑 Cargo.toml,在 [dependencies] 里加依赖:
[dependencies]
regex = "1"  # 也可以精确到 1.5.5 这样子
之后 build/run 的时候就会下载依赖。
PS: cargo add 功能今年四月份已经加入 cargo 仓库(https://github.com/rust-lang/cargo/pull/10472),可能再过几年,添加依赖就不需要手改 toml 了。
Update (2025/03/16):现在 cargo add 已经可以直接用了。
解析文件这个问题我们也考虑用正则表达式解决,所以先把这个依赖加上。
遍历文件
ports.tar.gz 解压之后可以得到一个很大的目录树,所以如何遍历文件是一个必须要解决的问题。去搜索的话会找到 https://rust-lang-nursery.github.io/rust-cookbook/file/dir.html,可以发现 walkdir 是一个不错的 crate。
use walkdir::WalkDir;

for entry in WalkDir::new("foo") {
    println!("{}", entry?.path().display());
}
(https://docs.rs/walkdir/latest/walkdir/)
于是思路就简单了:对于每个 entry,判断文件名是不是 distinfo,如果是,读文件,对第二行正则表达式读取文件名和 SHA256,把结果放进一个 Vec。最后排序输出就行。
-
这里的问号是一个语法糖:代表在返回
Result/Option的函数里,如果前面的值是Err/None,就直接返回。main()默认的返回值是空,但是也可以让它返回Result:use std::error::Error; fn main() -> Result<(), Box<dyn Error>> { for entry in WalkDir::new("foo") { println!("{}", entry?.path().display()); } Ok(()) }其中
std::error::Error是一个 trait,trait 本身作为Err中的内容类型没有什么意义,我们希望的是Err中的内容实现这个 trait(这两者是不同的),其对应的类型就是Box<dyn Error>。Box代表这个指针指向的内容在堆上,因为编译期不知道 Error 对应内容的大小。Box<dyn trait>也可以用来实现「虚函数」的功能,可以作为在运行时才知道是哪个结构体的值的类型。一个实验中遇到的例子是:同时实现了两种 cache 替换算法,用户在运行时指定选择哪种算法,那么算法暴露的接口由一个 trait 实现,而「算法对象」的类型就是Box<dyn ReplacementAlgorithm>。与之相对应的,
impl trait可以在编译期已知参数结构体的情况下为结构体生成对应的代码(相比于Box<dyn trait>,它在运行时的开销更小,但是生成的程序的体积更大,因为需要为每种结构体都生成函数实现)。参考代码1:
struct Madoka;
struct Homura;

trait Magi {
    fn name(&self) -> String;
}

impl Magi for Madoka {
    fn name(&self) -> String {
        "Kaname".to_string()
    }
}

impl Magi for Homura {
    fn name(&self) -> String {
        "Akemi".to_string()
    }
}

fn showname_static(m: &impl Magi) {
    println!("(static) {:}", m.name());
}

fn showname_dynamic(m: &dyn Magi) {
    println!("(dynmaic) {:}", m.name());
}

fn main() {
    let mut input = String::new();
    std::io::stdin()
        .read_line(&mut input)
        .expect("Error reading line");
    let input = input.trim();

    let madoka = Madoka {};
    let homura = Homura {};

    match input {
        "madoka" => {
            showname_static(&madoka);
            showname_dynamic(&madoka);
        }
        "homura" => {
            showname_static(&homura);
            showname_dynamic(&homura);
        }
        _ => panic!("unrecognized input"),
    };
}
看类型可以知道 entry?.path() 返回 std::path::Path,阅读 https://doc.rust-lang.org/nightly/std/path/struct.Path.html 可以得到我们需要的方法。于是可以一下子写出这样的代码:
// 编译不通过!
fn main() -> Result<(), Box<dyn Error>> {
    for entry in WalkDir::new("/tmp/ports") {
        let path = entry?.path();
        match path.file_name() {
            Some("distinfo") => {}
            _ => continue,
        }
        println!("{:?}", path);
    }
    Ok(())
}
第一个问题是 path.file_name() 类型是 Option<&OsStr>,但是我们的 Some("distinfo") 的类型是 Option<&'static str>。参考 https://stackoverflow.com/questions/42101070/how-to-match-a-file-extension-represented-as-an-osstr,由于文件名不一定是合法的 UTF-8 字符串,而 Rust 的字符串是 UTF-8,两者不能完全保证对应,所以分成不同的类型是可以理解的。因为我们明确知道 ports 里没有乱七八糟的文件名,所以对应的修改方法:
// 编译不通过!
let path = entry?.path();
match path.file_name().and_then(std::ffi::OsStr::to_str) {
    Some("distinfo") => {}
    _ => continue,
}
and_then() 是 Option 的链式调用的一部分:如果是 None 就返回 None,如果是 Some 就用参数中的函数处理。但是这个代码还是有问题的:
$ cargo run
   Compiling ports-distinfo-parse v0.1.0 (/path/to/naive-rust-examples/ports-distinfo-parse)
error[E0716]: temporary value dropped while borrowed
 --> src/main.rs:7:20
  |
7 |         let path = entry?.path();
  |                    ^^^^^^       - temporary value is freed at the end of this statement
  |                    |
  |                    creates a temporary which is freed while still in use
8 |         match path.file_name().and_then(std::ffi::OsStr::to_str) {
  |               ---- borrow later used here
  |
  = note: consider using a `let` binding to create a longer lived value

For more information about this error, try `rustc --explain E0716`.
error: could not compile `ports-distinfo-parse` due to previous error
这个错误实话讲很反直觉:entry?(或者 entry.unwrap())执行之后的结果是一个「临时变量」,这个临时变量会在这一行结束之后被丢弃,但是 path 有对这个临时变量内容的引用,所以出错。修这个「问题」很简单:
let entry = entry?;
let path = entry.path();
match path.file_name().and_then(std::ffi::OsStr::to_str) {
    Some("distinfo") => {}
    _ => continue,
}
之后也可以搜索到打开并读取文件内容的代码(https://doc.rust-lang.org/rust-by-example/std_misc/file/read_lines.html)
use std::{
    error::Error,
    fs::File,
    io::{self, BufRead},
};

use walkdir::WalkDir;

fn main() -> Result<(), Box<dyn Error>> {
    for entry in WalkDir::new("/tmp/ports") {
        let entry = entry?;
        let path = entry.path();
        match path.file_name().and_then(std::ffi::OsStr::to_str) {
            Some("distinfo") => {}
            _ => continue,
        }
        let file = File::open(path)?;
        let lines = io::BufReader::new(file).lines();
        for line in lines {
            if let Ok(line) = line {
                if line.starts_with("SHA256") {
                    // extract filename and sha256
                    // ...
                    break;
                }
            }
        }
    }
    Ok(())
}
由于 SHA256 不一定在 distinfo 的第二行(实际写代码测试一下就能发现),所以还是需要遍历每一行。
正则表达式
正则不难写,最简单的写法是:
SHA256 \((.+)\) = (\w+)
阅读 https://docs.rs/regex/latest/regex/ 文档,可以知道首先我们需要定义 regex:
let re = Regex::new(r"SHA256 \((.+)\) = (\w+)").unwrap();
re 的类型是 Regex。因此再读 Regex struct 的文档,可以知道要使用 captures(https://docs.rs/regex/latest/regex/struct.Regex.html#method.captures),最后的代码:
let caps = re.captures(&line).unwrap();
let filename = caps.get(1).unwrap().as_str();
let sha256 = caps.get(2).unwrap().as_str();
println!("{} {}", filename, sha256);
内置数据结构
Rust 标准库的 collections 提供了一些常用的数据结构(https://doc.rust-lang.org/std/collections/index.html),包括:
- Vector、双端队列和链表
- 哈希表(Map)和 B 树表
- 哈希集合(Set)和 B 树集合
- 二叉堆(优先队列)
当然,我们这里的需求用 vector 就可以解决。直接改的话会写出这样的代码:
let mut result = Vec::new();
// ...
for line in lines {
    if let Ok(line) = line {
        if line.starts_with("SHA256") {
            // extract filename and sha256
            let caps = re.captures(&line).unwrap();
            let filename = caps.get(1).unwrap().as_str();
            let sha256 = caps.get(2).unwrap().as_str();
            result.push((filename, sha256));
            break;
        }
    }
}
但是这是无法通过编译的:因为 filename 和 sha256 都是 &str,但是在循环的过程中上一次的引用的目标会被丢弃。这里我们必须要复制(转换成 String):
result.push((filename.to_owned(), sha256.to_owned()));
(to_string() 也可以,几种转换方式没有区别)
在全部处理完成之后再排序输出:
result.sort();
for item in result {
    println!("{} {}", item.1, item.0);
}
但是 tuple 之间怎么比较呢?文档中没有很清楚的描述,阅读标准库源代码可以发现这个过程是递归的,会从第一个元素开始比较:
macro_rules! lexical_cmp {
    ($a:expr, $b:expr, $($rest_a:expr, $rest_b:expr),+) => {
        match ($a).cmp(&$b) {
            Equal => lexical_cmp!($($rest_a, $rest_b),+),
            ordering   => ordering
        }
    };
    ($a:expr, $b:expr) => { ($a).cmp(&$b) };
}
因为我们第一个元素就是需要排序的文件名,所以直接 sort() 没有问题。
最后这个能够运行的代码不算长:
use std::{
    error::Error,
    fs::File,
    io::{self, BufRead},
};

use regex::Regex;
use walkdir::WalkDir;

fn main() -> Result<(), Box<dyn Error>> {
    let re = Regex::new(r"SHA256 \((.+)\) = (\w+)").unwrap();
    let mut result = Vec::new();
    for entry in WalkDir::new("/tmp/ports") {
        let entry = entry?;
        let path = entry.path();
        match path.file_name().and_then(std::ffi::OsStr::to_str) {
            Some("distinfo") => {}
            _ => continue,
        }
        let file = File::open(path)?;
        let lines = io::BufReader::new(file).lines();
        for line in lines {
            if let Ok(line) = line {
                if line.starts_with("SHA256") {
                    // extract filename and sha256
                    let caps = re.captures(&line).unwrap();
                    let filename = caps.get(1).unwrap().as_str();
                    let sha256 = caps.get(2).unwrap().as_str();
                    result.push((filename.to_owned(), sha256.to_owned()));
                    break;
                }
            }
        }
    }
    result.sort();
    for item in result {
        println!("{} {}", item.1, item.0);
    }
    Ok(())
}
命令行参数
现在还有一个问题:"/tmp/ports" 这个参数如果能从命令行参数输入就好了。从 cookbook 里可以搜到 clap crate 可以解决这个问题。
仿照 clap 的 example 写:
#[derive(Parser, Debug)]
#[clap(author, version, about, long_about = None)]
struct Args {
    /// Path of ports
    #[clap(short, long)]
    path: String
}

// ...
let args = Args::parse();
// ...
for entry in WalkDir::new(path) {
    // ...
}
与此同时我们需要添加依赖,和之前 regex 和 walkdir 不同,为了使用以上的语法,我们需要设定 crate 需要使用的 feature,就像这样子:
clap = { version = "3", features = ["derive"] }
试运行:
$ cargo run -- --help
   Compiling ports-distinfo-parse v0.1.0 (/path/to/naive-rust-examples/ports-distinfo-parse)
    Finished dev [unoptimized + debuginfo] target(s) in 3.07s
     Running `target/debug/ports-distinfo-parse --help`
ports-distinfo-parse 0.1.0

USAGE:
    ports-distinfo-parse --path <PATH>

OPTIONS:
    -h, --help           Print help information
    -p, --path <PATH>    Path of ports
    -V, --version        Print version information
$ cargo run -- --path /tmp/ports > /tmp/output.txt
Done!
“Executor”
我在大四初学 Go 语言的时候写过一个名叫 executor 的小工具:执行程序,接管程序的 stdout 和 stderr,输出的时候前面写上程序的命令和 PID。我很喜欢这个小工具,因为跑实验的时候真的很好用。Go 也是一门不错的语言,go func 的语法相当方便。
这个例子旨在用 Rust 实现一样的事情(省略掉颜色的实现)。
线程实现
首先要知道怎么启动进程并获取 stdout/stderr。参考 https://rust-lang-nursery.github.io/rust-cookbook/os/external.html#continuously-process-child-process-outputs,用管道连接 stdout 和 stderr,可以写出这样的代码:
use std::{
    error::Error,
    process::{Command, Stdio},
};

fn main() -> Result<(), Box<dyn Error>> {
    let process = Command::new("ls")
        .stdout(Stdio::piped())
        .stderr(Stdio::piped())
        .spawn()?;
    let stdout = process.stdout.unwrap();
    let stderr = process.stderr.unwrap();
    // ...
    Ok(())
}
因为我们需要同时处理 stdout 和 stderr,所以一种方法是启动两个线程。Rust 对线程有着很好的支持,the book 中的实际项目例子就是写一个多线程 HTTP 服务器。所以让我们来试一下:
let stdout = std::thread::spawn(move || {
    let reader = BufReader::new(stdout);
    reader.lines().filter_map(|line| line.ok()).for_each(|line| {
        println!("[stdout] {}", line);
    });
});
let stderr = std::thread::spawn(move || {
    let reader = BufReader::new(stderr);
    reader.lines().filter_map(|line| line.ok()).for_each(|line| {
        println!("[stderr] {}", line);
    });
});
stdout.join().unwrap();
stderr.join().unwrap();
这里的 move 代表将闭包内使用的变量「移动」到闭包里面。此时程序已经可以运行了,但是还差一些东西:
-
显示程序名和 PID。
这个并不难做,但是在 move 的时候会遇到问题:
let program = "ls";
// ...
let pid = process.id();
let displayed_name = format!("[{}] {}", program, pid);
// ...
// 编译不通过!
let stdout = std::thread::spawn(move || {
    let reader = BufReader::new(stdout);
    reader.lines().filter_map(|line| line.ok()).for_each(|line| {
        println!("{} stdout: {}", displayed_name, line);
    });
});
let stderr = std::thread::spawn(move || {
    let reader = BufReader::new(stderr);
    reader.lines().filter_map(|line| line.ok()).for_each(|line| {
        println!("{} stderr: {}", displayed_name, line);
    });
});
结果:
$ cargo run
   Compiling executor-threaded v0.1.0 (/path/to/naive-rust-examples/executor-threaded)
error[E0382]: use of moved value: `displayed_name`
  --> src/main.rs:24:37
   |
14 |     let displayed_name = format!("[{}] {}", program, pid);
   |         -------------- move occurs because `displayed_name` has type `String`, which does not implement the `Copy` trait
...
18 |     let stdout = std::thread::spawn(move || {
   |                                     ------- value moved into closure here
...
21 |             println!("{} stdout: {}", displayed_name, line);
   |                                       -------------- variable moved due to use in closure
...
24 |     let stderr = std::thread::spawn(move || {
   |                                     ^^^^^^^ value used here after move
...
27 |             println!("{} stderr: {}", displayed_name, line);
   |                                       -------------- use occurs due to use in closure

For more information about this error, try `rustc --explain E0382`.
error: could not compile `executor-threaded` due to previous error
这是因为在第一个 move 里面,
displayed_name已经移入了第一个线程,因此第二个线程无法移入这个变量。 最简单的解决方法是把displayed_name再复制一份,然后为不同的线程提供不同的变量:let name = displayed_name.clone(); let stdout = std::thread::spawn(move || { let reader = BufReader::new(stdout); reader.lines().filter_map(|line| line.ok()).for_each(|line| { println!("{} stdout: {}", displayed_name, line); }); }); let stderr = std::thread::spawn(move || { let reader = BufReader::new(stderr); reader.lines().filter_map(|line| line.ok()).for_each(|line| { println!("{} stderr: {}", name, line); }); });当然也可以用引用计数的智能指针,对应的是 Rust 中的
Rc,可以让一个变量有多个所有者。在多线程的情况下则需要用原子的Arc(A 对应 atomic):let displayed_name = Arc::new(format!("[{}] {}", program, pid)); let name = Arc::clone(&displayed_name); // ... 1st move let name = Arc::clone(&displayed_name); // ... 2nd move当然这里没有这个必要。
-
命令行参数:使用 clap,这里用 clap 的 “Builder API”,不进一步展开 clap 的使用细节。
use clap::{Arg, Command as ClapCommand};

let matches = ClapCommand::new("executor")
    .trailing_var_arg(true)
    .allow_hyphen_values(true)
    .arg(
        Arg::new("shell")
            .long("shell")
            .help("Use shell to run cmd")
            .takes_value(false),
    )
    .arg(Arg::new("cmd").multiple_values(true).required(true))
    .get_matches();
let mut program: Vec<&str> = matches.values_of("cmd").unwrap().collect();
let joined;
if matches.is_present("shell") {
    joined = program.join(" ");
    program = vec!["/bin/sh", "-c", joined.as_str()];
}
let process = Command::new(program[0])
    .args(&program[1..])
    .stdout(Stdio::piped())
    .stderr(Stdio::piped())
    .spawn()?;
let pid = process.id();
let displayed_name = format!("{:?} {}", program, pid);
几个点:
-
collect()用来将迭代器转换为一个 “collection”(比如说 vector),需要类型标识。 - 因为
sh -c的第三个参数就是要用 shell 运行的程序,所以需要先 join 用来之后把所有参数塞在program[2]里面。vec!是用来快速创建 vector 的宏。 -
let可以定义一个未初始化的变量,这里可以让joined不至于在if块结束之后就被销毁,否则joined.as_str()的引用就失效了。 - Rust 用
x..y的语法表示 [x, y) 的范围:-
1..:从 1 到最后 -
..5:从 0(最开始)到 5 -
1..=3:从 1 到 3(包含 3)
-
-
use需要用Command as ClapCommand,因为和std::process的Command重名了。
-
-
返回被执行程序的返回值。Rust 的
main()不返回退出状态值(internally,调用main()的真正的入口点start()可以返回一个 i32),不过我们可以用std::process::exit()来带返回值退出程序。但是还有一个小问题:
process.wait()?的值是ExitStatus,而其code()方法的返回值是Option<i32>,当程序被 signal 杀掉的时候值为None。迂回的解决方法:use std::os::unix::process::ExitStatusExt; // 编译不通过! let return_code = process.wait()?; std::process::exit(match return_code.code() { Some(code) => code, None => 128 + return_code.signal().unwrap(), });可以注意到,
exit()的返回值是!,代表这个函数不会返回。但是仍然存在所有权问题:stdout 和 stderr 被移动到了线程里,但是
process又要在检查程序返回值的时候用到(而且需要可变引用,而存在一个可变引用的情况下不能有其他任何引用)。Rust 编译器不知道线程是否结束(至少没有把线程是否已经 join 考虑到 borrow checker 里)。标准库文档对此的解决方法是:The handle for reading from the child’s standard output (stdout), if it has been captured. You might find it helpful to do
let stdout = child.stdout.take().unwrap();to avoid partially moving the
childand thus blocking yourself from calling functions onchildwhile usingstdout.take()的作用是把Option里面的值取出来,然后塞个None回去,以此来让stdout和stderr与child脱离关系。此外可以注意到,
match语句在这里是一个完整的表达式,可以直接作为函数的参数,类似的例子诸如替代三元运算符的:// 替代 (y > 1) ? (y * 2) : (y - 5) let x = if y > 1 { y * 2 } else { y - 5 };表达式甚至可以是一段完整的程序逻辑:
let x = {
    let y = 5;
    let z = 6;
    if y > z {
        z * y
    } else {
        y * (-z)
    }
};
作为程序返回值的语句最后不加分号(所以在函数中的
return很多时候是可以省略的)。
最后的完整代码如下:
use clap::{Arg, Command as ClapCommand};
use std::os::unix::process::ExitStatusExt;
use std::{
    error::Error,
    io::{BufRead, BufReader},
    process::{exit, Command, Stdio},
};

fn main() -> Result<(), Box<dyn Error>> {
    let matches = ClapCommand::new("executor")
        .trailing_var_arg(true)
        .allow_hyphen_values(true)
        .arg(
            Arg::new("shell")
                .long("shell")
                .help("Use shell to run cmd")
                .takes_value(false),
        )
        .arg(Arg::new("cmd").multiple_values(true).required(true))
        .get_matches();
    let mut program: Vec<&str> = matches.values_of("cmd").unwrap().collect();
    let joined;
    if matches.is_present("shell") {
        joined = program.join(" ");
        program = vec!["/bin/sh", "-c", joined.as_str()];
    }
    let mut process = Command::new(program[0])
        .args(&program[1..])
        .stdout(Stdio::piped())
        .stderr(Stdio::piped())
        .spawn()?;
    let pid = process.id();
    let displayed_name = format!("{:?} {}", program, pid);
    let stdout = process.stdout.take().unwrap();
    let stderr = process.stderr.take().unwrap();
    // thread for stdout and stderr
    let name = displayed_name.clone();
    let stdout = std::thread::spawn(move || {
        let reader = BufReader::new(stdout);
        reader
            .lines()
            .filter_map(|line| line.ok())
            .for_each(|line| {
                println!("{} stdout: {}", displayed_name, line);
            });
    });
    let stderr = std::thread::spawn(move || {
        let reader = BufReader::new(stderr);
        reader
            .lines()
            .filter_map(|line| line.ok())
            .for_each(|line| {
                println!("{} stderr: {}", name, line);
            });
    });
    stdout.join().unwrap();
    stderr.join().unwrap();
    let return_code = process.wait()?;
    exit(match return_code.code() {
        Some(code) => code,
        None => 128 + return_code.signal().unwrap(),
    });
}
异步实现
开启两个线程虽然可以,但是还是「太重」了。如果能用这几年流行的 async 来实现岂不美哉?
对应的:
- thread 要变成「协程」;
- 协程里面的函数需要是 async 的。
两个 最流行的 async runtime 实现是 tokio 和 async-std。这里选择 async-std,因为它 “provides an async version of std”,对于修改已有代码来说看起来更方便一些。
Update (2025/03/16): async-std 已经不再维护,以下例子更换为 tokio。
添加 tokio 依赖项:
tokio = { version = "1", features = ["full"] }
首先把 main() 改成 async 的:
#[tokio::main]
async fn main() -> Result<(), Box<dyn Error>> {
    // ...
}
然后 std::thread::spawn 的对应物是 tokio::spawn,所以我们需要:
let stdout = tokio::spawn(async move {
    // async func
});
let stderr = tokio::spawn(async move {
    // async func
});
let _ = stdout.await?;
let _ = stderr.await?;
之后我们需要一个不会阻塞住的 BufReader,这可以直接使用 tokio::io::BufReader 替代,但同时 stdout 和 stderr 也需要是异步的,这可以通过将 std::process::Command 替换为 tokio::process::Command 来实现。同时 reader.lines 需要 tokio::io::AsyncBufReadExt 这个 trait。
let mut process = tokio::process::Command::new(program[0])
    .args(&program[1..])
    .stdout(Stdio::piped())
    .stderr(Stdio::piped())
    .spawn()?;
// ...
let stdout = tokio::spawn(async move {
    let reader = tokio::io::BufReader::new(stdout);
    reader.lines() // ...
});
但是 reader.lines() 返回的在 tokio 中不是一个迭代器,而是一个 tokio 自己的结构体,需要用 next_line().await 来获取下一行。因为 next_line 可能会失败,顺便加上了 ?,以及 async 块的返回类型。
let stdout: JoinHandle<Result<(), tokio::io::Error>> = tokio::spawn(async move {
    let reader = tokio::io::BufReader::new(stdout);
    let mut lines = reader.lines();
    while let Some(line) = lines.next_line().await? {
        println!("{} stdout: {}", displayed_name, line);
    }
    Ok(())
});
let stderr: JoinHandle<Result<(), tokio::io::Error>> = tokio::spawn(async move {
    let reader = tokio::io::BufReader::new(stderr);
    let mut lines = reader.lines();
    while let Some(line) = lines.next_line().await? {
        println!("{} stderr: {}", name, line);
    }
    Ok(())
});
最后,process.wait() 也需要加上 await:
let return_code = process.wait().await?;
old async-std code
首先把 main() 改成 async 的(需要 attributes feature,https://docs.rs/async-std/latest/async_std/#examples):
#[async_std::main]
async fn main() -> Result<(), Box<dyn Error>> {
    // ...
}
然后 std::thread::spawn 的对应物是 async_std::task::spawn,所以我们需要:
let stdout = async_std::task::spawn(async move {
    // async func
});
let stderr = async_std::task::spawn(async move {
    // async func
});
stdout.await;
stderr.await;
之后 BufReader 可以直接使用 async_std::io::BufReader 替代,但是这需要 stdout 和 stderr 是可以异步读取的。因此还需要把 std::process 的实现换成 async_std::process 的,这需要 unstable feature(https://docs.rs/async-std/latest/async_std/process/index.html),启用之后:
use async_std::process::{exit, Command, Stdio};

// 创建进程的代码不需要更改
let return_code = process.status().await?;
最后在 async 函数内引入需要的依赖项,最后加上 await(否则返回 future 之后 async 函数就直接结束了):
use async_std::{
    io::{prelude::BufReadExt, BufReader},
    prelude::StreamExt,
};

let stdout = async_std::task::spawn(async move {
    let reader = BufReader::new(stdout);
    reader
        .lines()
        .filter_map(|line| line.ok())
        .for_each(|line| {
            println!("{} stdout: {}", displayed_name, line);
        }).await;
});
搞定。这里给出的仅仅是一个示例,async rust 仍然在快速发展中,希望未来写 async 代码能够和写 sync 代码一样容易。
尴尬并行:n 皇后的所有解
单线程实现
用回溯法解 n 皇后问题需要维护这么几个变量:
- 每行皇后所处的列数
- 每列、两对角线是否存在冲突
用 C/C++ 做算法题目的时候可能会把所有这些变量一个一个设置为数组,然后都扔到全局变量里面。但是既然是展示的代码,那么如果可以的话还是要考虑一下代码结构的,比如说把所有状态都放在一个结构体里:
struct QueenState {
    board: Vec<Option<usize>>,
    col: Vec<bool>,
    diag: Vec<bool>,     // x - y
    antidiag: Vec<bool>, // x + y
    n: usize,
}
并且将放置皇后、取消放置和检查的代码放在结构体实现里:
macro_rules! diag_index {
    ($row: expr, $col: expr, $n: expr) => {
        // $row - $col + $n - 1
        $row + $n - $col - 1
    };
}

impl QueenState {
    fn new(n: usize) -> Self {
        QueenState {
            board: vec![None; n],
            col: vec![false; n],
            diag: vec![false; 2 * n - 1],
            antidiag: vec![false; 2 * n - 1],
            n,
        }
    }

    // fn diag_index(&self, row: usize, col: usize) -> usize {
    //     row - col + self.n - 1
    // }

    fn put(&mut self, row: usize, col: usize) {
        debug_assert!(self.board[row] == None);
        debug_assert!(row < self.n && col < self.n);
        self.board[row] = Some(col);
        self.col[col] = true;
        self.diag[diag_index!(row, col, self.n)] = true;
        self.antidiag[row + col] = true;
    }

    fn unput(&mut self, row: usize, col: usize) {
        debug_assert!(self.board[row] == Some(col));
        debug_assert!(row < self.n && col < self.n);
        self.board[row] = None;
        self.col[col] = false;
        self.diag[diag_index!(row, col, self.n)] = false;
        self.antidiag[row + col] = false;
    }

    fn check(&self, row: usize, col: usize) -> bool {
        debug_assert!(row < self.n && col < self.n);
        !self.col[col] && !self.diag[diag_index!(row, col, self.n)] && !self.antidiag[row + col]
    }
}
这里:
- 需要使用
self的方法(instance 的方法)的第一个参数都是&self或者&mut self,代表不可变/可变 borrow self。假使类型可以不是引用的话,那instance.method()执行完之后instance就用不了了,这绝大多数时候都不行。 -
debug_assert用来在 debug 模式(非 release 模式)下 assert,release 的时候不会执行。 -
这边定义了宏
diag_index用来计算左上到右下对角线是否有重复的数组(self.diag)的 index。定义成 method 直接使用的话会有 borrow 的问题:// 编译不通过! fn diag_index(&self, row: usize, col: usize) -> usize { row - col + self.n - 1 } fn put(&mut self, row: usize, col: usize) { debug_assert!(self.board[row] == None); debug_assert!(row < self.n && col < self.n); self.board[row] = Some(col); self.col[col] = true; // self.diag[diag_index!(row, col, self.n)] = true; self.diag[self.diag_index(row, col)] = true; self.antidiag[row + col] = true; }$ cargo run Compiling nqueen-channel v0.1.0 (/path/to/naive-rust-examples/nqueen-channel) error[E0502]: cannot borrow `*self` as immutable because it is also borrowed as mutable --> src/main.rs:37:19 | 37 | self.diag[self.diag_index(row, col)] = true; | ----------^^^^---------------------- | | | | | immutable borrow occurs here | mutable borrow occurs here | mutable borrow later used here For more information about this error, try `rustc --explain E0502`. error: could not compile `nqueen-channel` due to previous error因为
self.diag已经 mutable borrow 了self,index 里面再 borrow 就不行了。如果分开来写又有点麻烦,还不如用宏:macro_rules! diag_index { ($row: expr, $col: expr, $n: expr) => { // $row - $col + $n - 1 $row + $n - $col - 1 }; }与 C 类语言的宏的字符串替换不同,Rust 的宏是直接在语法树上进行修改的,所以相对而言复杂得多,也能像 C++ 的模板一样玩出很多花样。
-
可以注意到本来写的是
$row - $col + $n - 1,但是最后改成了$row + $n - $col - 1。由于很多程序问题都是预期以外的整数溢出导致的,Rust 的应对策略是(https://github.com/rust-lang/rfcs/blob/master/text/0560-integer-overflow.md):- Debug 模式下检查是否溢出,如果溢出则 panic;
- Release 模式下不检查溢出,以补码(two’s complement)处理。
这里由于 row 可能小于 col,会溢出,所以先让它加 n 再做减法。
然后是 DFS 的逻辑:
fn queen(n: usize) {
    let mut state = QueenState::new(n);
    fn dfs(state: &mut QueenState, n: usize, row: usize) {
        if row == n {
            println!(
                "{:?}",
                state.board.iter().map(|x| x.unwrap()).collect::<Vec<_>>()
            );
            return;
        }
        for col in 0..n {
            if state.check(row, col) {
                state.put(row, col);
                dfs(state, n, row + 1);
                state.unput(row, col);
            }
        }
    }
    dfs(&mut state, n, 0);
}
-
函数里面可以套函数,这里就可以给用户更加简洁的接口。Mutable 的全局变量
static mut反而会麻烦很多很多,不仅初始值只能接受 const 的函数,而且所有访问和修改都必须在unsafe里面。不过和某些语言(JavaScript)不同,这里内层的函数不是闭包,访问外层函数的变量仍然需要显式传值。
-
最后
board里面的类型是Option<usize>,所以map来取出Some里面的值(执行到最后理应没有None),collect 来重新聚合成Vec。Vec<_>代表让编译器去推理_的实际类型。
用户运行的时候直接:
fn main() {
    const SIZE: usize = 8;
    queen(SIZE);
}
就行了。
当然,如果把 8 改成 15,程序运行会慢一些(即使开了 --release,因为时间复杂度是 O(n!))。那么一个自然的想法就是用多线程来计算不同分支的 DFS。
消息传递
Golang 关于并发编程的名句:
Do not communicate by sharing memory; instead, share memory by communicating.
Goroutine 的 channel 用起来也确实方便。而消息传递的模型在 Rust 中也可以轻松使用。这里我们使用消息传递模型让线程把计算结果传递到主线程再输出。
在加入消息传递之前,先修改一下代码,将第一行放置不同列的任务分配到不同的线程:
fn queen(n: usize, starting_col: usize) {
    debug_assert!(starting_col < n);
    let mut state = QueenState::new(n);
    state.put(0, starting_col);
    // ...
    dfs(&mut state, n, 1);
}

fn main() {
    const SIZE: usize = 15;
    const THREAD: usize = 4;
    let mut handles = vec![];
    for i in 0..THREAD {
        let range = (i * SIZE / THREAD)..((i + 1) * SIZE / THREAD);
        let handle = std::thread::spawn(move || {
            for j in range {
                queen(SIZE, j);
            }
        });
        handles.push(handle);
    }
    for handle in handles {
        handle.join().unwrap();
    }
}
然后就是消息传递的改造,使用 std::sync::mpsc(mpsc: “multi producer, single consumer”,多个生产/发送者 + 一个消费/接收者),创建 channel 的语法如下:
let (tx, rx) = mpsc::channel();
其中 tx 是给计算线程的发送端(Sender),rx 是主线程的接收端(Receiver)。但是光加这一行会报错,因为无法推断 Sender<> 和 Receiver<> 里面的类型是什么。我们先修改 queen(),加上 tx 参数:
fn queen(n: usize, starting_col: usize, tx: &Sender<Vec<usize>>) {
    // ...
    fn dfs(state: &mut QueenState, n: usize, row: usize, tx: &Sender<Vec<usize>>) {
        if row == n {
            let vec = state.board.iter().map(|x| x.unwrap()).collect::<Vec<_>>();
            tx.send(vec).unwrap();
            return;
        }
        // ...
    }
    dfs(&mut state, n, 1, tx);
}
Sender 没有实现 Copy trait,所以 dfs 的 tx 参数必须是引用,否则递归的时候 tx 的 ownership 就被下一层 DFS 吃了。
之后在直觉上可能会这么写:
// 编译不通过!
for i in 0..THREAD {
    let range = (i * SIZE / THREAD)..((i + 1) * SIZE / THREAD);
    let handle = std::thread::spawn(move || {
        for j in range {
            queen(SIZE, j, &tx);
        }
    });
    handles.push(handle);
}
但是这是错误的:move 导致第一次创建线程的时候 tx 被移入。我们需要每次 clone tx:
for i in 0..THREAD {
    let range = (i * SIZE / THREAD)..((i + 1) * SIZE / THREAD);
    let tx = tx.clone();
    let handle = std::thread::spawn(move || {
        for j in range {
            queen(SIZE, j, &tx);
        }
    });
    handles.push(handle);
}
最后在 rx 这里等待输出。由于 tx 和线程的生命周期一致,不需要 join 了:
for received in rx {
    println!("{:?}", received);
}
但是运行之后发现,程序在输出结束之后并未退出,而是卡死了:
$ cargo run
...
[1, 6, 4, 7, 0, 3, 5, 2]
[1, 7, 5, 0, 2, 4, 6, 3]
这是因为发生了死锁:需要注意到,即使在所有计算线程执行完成后,tx 变量本体并未被释放,因为变量获得的都是 clone 之后的 tx。最后 rx 仍然在等待这个 tx 发送传达不到的消息。
还记得在本文开头一块提到过的 std::mem::drop 吗?是它上场的时候了:
std::mem::drop(tx);
for received in rx {
    println!("{:?}", received);
}
最后成功运行。这里的例子告诉我们:Rust 的「内存安全」模型不解决死锁的问题(即,死锁也是内存安全的)。死锁检测(预防)本身在编译期也是很难实现的。
共享变量
当然,我们也可以用共享变量 + mutex(互斥锁)的做法来处理这个问题。
前面提到过,线程之间可以用 Arc 来使得一个变量被多个线程拥有。但是由于同时只能存在一个可变引用,我们希望每个线程都要写入这个变量,所以还需要一个「东西」来暴露出不可变的、但是实际值可以变化的引用。对应实际需求,这就是锁。而在 Rust 中这种性质被称为「内部可变性」(Interior Mutability)。标准库中提供了两种锁:
-
Mutex。一旦上锁,其他线程需要等待解锁才能访问变量。 -
RwLock。多个线程可以同时获取读取锁读取变量,想要写入变量的线程需要等待其他线程读取完成后才能获得写入锁。在某个线程拥有写入锁时,其他线程不管需要读还是写都需要等待。(RwLock 很容易死锁,务必小心!)
对应我们的需求的则是 Mutex。我们的变量这么定义:
let result = Arc::new(Mutex::new(Vec::new()));
result 的类型是 Arc<Mutex<Vec<Vec<usize>>>>。类似地,在每次循环的时候也要 clone:
for i in 0..THREAD {
    let range = (i * SIZE / THREAD)..((i + 1) * SIZE / THREAD);
    let vec = result.clone();
    let handle = std::thread::spawn(move || {
        for j in range {
            queen(SIZE, j, &vec);
        }
    });
    handles.push(handle);
}
queen 函数也需要修改:
fn queen(n: usize, starting_col: usize, vec: &Arc<Mutex<Vec<Vec<usize>>>>) {
    // ...
    fn dfs(state: &mut QueenState, n: usize, row: usize, vec: &Arc<Mutex<Vec<Vec<usize>>>>) {
        if row == n {
            vec.lock()
                .unwrap()
                .push(state.board.iter().map(|x| x.unwrap()).collect::<Vec<_>>());
            return;
        }
        // ...
    }
    dfs(&mut state, n, 1, vec);
}
这里 vec.lock().unwrap() 可以给 vec 上锁,并获取到这个 vector。可以注意到这里没有解锁的代码,这是因为 RAII 的思想:在变量离开它的 scope 之后变量代表的资源(这里是 mutex)就自动被释放了,所以不用担心自己忘了 unlock,前面打开文件之后没有(显式)关闭(事实上 Rust 没有提供「关闭文件」的方法)也是因为 RAII,文件自动就关闭了。
最后等待线程执行结束,然后输出:
for handle in handles {
    handle.join().unwrap();
}
let result = result.lock().unwrap();
for item in result.iter() {
    println!("{:?}", item);
}
尽管已经不再需要锁了,但是最后一下访问还是要 lock。最后的循环用了 iter() 也是这个原因:默认的 into_iter() 需要把 vector 的 ownership 从 mutex 里面拿出来,而这在需要加锁的环境下显然会有问题。
尽管程序完成了,这一节还有一样东西可以介绍:如果我们需要的不是每种解法,而只是解的数量呢?我们当然可以给 i32 或者 usize 套个 mutex,或者让线程每算出一个解就发送一次消息更新计数器,但是有更简单的方法:原子变量。
首先定义原子变量(https://doc.rust-lang.org/std/sync/atomic/struct.AtomicUsize.html):
use std::sync::atomic::AtomicUsize;

let result = Arc::new(AtomicUsize::new(0));
可以看到不需要 Mutex,然后看一下更新和读取的逻辑:
use std::sync::atomic::Ordering;

fn dfs(state: &mut QueenState, n: usize, row: usize, cnt: &Arc<AtomicUsize>) {
    if row == n {
        cnt.fetch_add(1, Ordering::SeqCst);
        return;
    }
    // ...
}

// ...
println!("{}", result.load(Ordering::SeqCst));
可以看到,首先 fetch_add 不需要 &mut self,所以省下了 mutex lock。然后特别的,在使用原子变量的时候,我们需要去思考一件平时不会在意的问题:内存序。Rust 的内存序系统和 C++20 一致。这里内存序都使用了最严格的顺序(序列一致性),但是实际上不需要这么严格。
思考这样一个问题:多个 CPU(或者 CPU 核心)共享内存中的同一个变量,但是如果每次读写都要走一遍内存,那还是太慢了(L1 cache 访问需要 1ns,而 DDR 内存访问需要大约 80ns)。因此每个 CPU 都可能会在自己的缓存里保存变量值,这就带来了一致性相关的问题,如此这般,硬件设计中为了性能考虑带来的一致性问题也就导致了内存序问题,并且不同的架构内存序宽松程度是不同的,这也给跨体系结构的应用移植带来了挑战(导致有些体系结构上运行毫无问题的程序,在另一种架构上编译运行可能就会时不时出现并发问题)。
由弱到强,Rust 中提供了这五种内存序:
- Relaxed,不管顺序,只保证修改最终可以写回。
- Release,释放/发布变量的写入,其他线程用更强的内存序的时候,可以保证看到之前的所有写入。
- Acquire,「获取」最新的变量,可以看到之前被 Release 或者更强的内存序写入的内容。
- AcqRel,Acquire + Release,用于既有读取、又有写入的操作。
- SeqCst,在 AcqRel 的基础上保证所有线程看到相同的操作顺序。
基于以上介绍,程序代码的内存序可以改成:
use std::sync::atomic::Ordering;

fn dfs(state: &mut QueenState, n: usize, row: usize, cnt: &Arc<AtomicUsize>) {
    if row == n {
        cnt.fetch_add(1, Ordering::AcqRel);
        return;
    }
    // ...
}

// ...
println!("{}", result.load(Ordering::Acquire));
宏
宏在前面已经有一点很简略的介绍。在 the book 中是这样介绍的:
macros are a way of writing code that writes other code, which is known as metaprogramming
利用宏我们可以实现一些在原本 Rust 语法中比较麻烦的事情,甚至是定义自己的 DSL,像这个例子(作者未知,如果知道作者是谁的话可以告诉我 😂)里展示的一样,使用效果:
定义价格规则!(
    买 0 - 5 件, 单价 5.0 元,
    买 6 - 10 件, 单价 4.0 元,
    买 11 - 20 件, 单价 3.0 元,
    超过 20 件统统 2.5 元
);
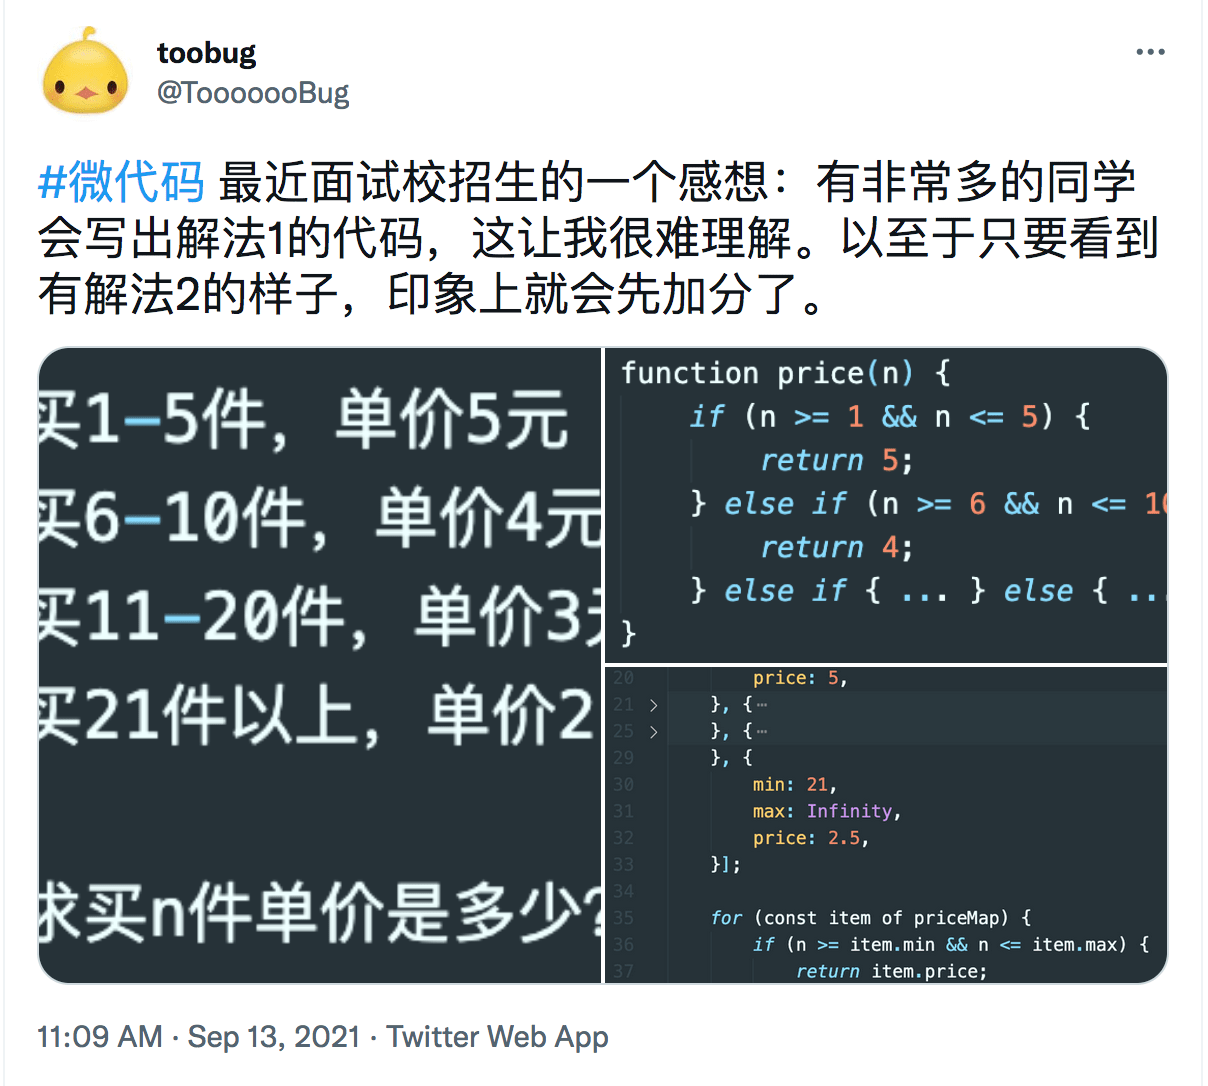
似乎是这个宏的故事背景(2022/5/17 added)
当然,我的水平有限,这里不介绍复杂的例子。
第一个宏
macro_rules! diag_index {
    ($row: expr, $col: expr, $n: expr) => {
        $row + $n - $col - 1
    };
}
这个宏接受三个参数(参数开头都必须是 $),它们类型都是 expr(表达式)。参数类型还可以是其他的,例如 ident(标识符)。https://doc.rust-lang.org/reference/macros-by-example.html#metavariables
使用 macro_rules! 定义的宏全称为「以例子(构造)的宏」(macros by example),另一种构造方式被称为「(基于)过程的宏」(procedural macros),这里不详细介绍,可参考阅读 https://doc.rust-lang.org/reference/macros.html。
加法的比较
前面提到,Rust 对整数溢出问题有着自己的处理方式。以整数加法为例,就有 checked_add, wrapping_add 和 saturating_add 这三种方法。如何测试它们在溢出时的情况呢?
当然可以这么写代码:
let x = i32::MAX.checked_add(1);
println!("i32::MAX + 1 by {} returns {:#?}", "checked_add", x);
let x = i32::MAX.wrapping_add(1);
println!("i32::MAX + 1 by {} returns {:#?}", "wrapping_add", x);
let x = i32::MAX.saturating_add(1);
println!("i32::MAX + 1 by {} returns {:#?}", "saturating_add", x);
但是用宏可以实现得更优雅。下面是宏的实现:
macro_rules! custom_add {
    ($x: expr, $y: ident) => {
        let res = $x.$y(1);
        println!("{} + 1 by {} returns {:#?}", $x, stringify!($y), res);
    };
}
其中 $x 是表达式(对应 i32::MAX),$y 是标识符(对应三种不同的方法)。其中一个关键点是 stringify! 宏可以给出标识符的字符串表示。于是最后调用代码只需要三行:
custom_add!(i32::MAX, checked_add);
custom_add!(i32::MAX, wrapping_add);
custom_add!(i32::MAX, saturating_add);
输出:
2147483647 + 1 by checked_add returns None
2147483647 + 1 by wrapping_add returns -2147483648
2147483647 + 1 by saturating_add returns 2147483647
ANSI CSI 序列
ANSI 转义序列能控制终端实现很多功能。而其中一类是 CSI 序列。
CSI 序列的格式是 ESC [ + 参数字节(parameter bytes)+ 中间字节(intermediate bytes) + 最终字节(a single final byte)。可以实现例如修改文字前景色和背景色的功能。
在 crossterm 和 termion 这两个 crate 里,组装 csi 序列的宏的代码 完 全 一 致:
macro_rules! csi {
    ($( $l:expr ),*) => { concat!("\x1B[", $( $l ),*) };
}
https://github.com/redox-os/termion/blob/8054e082b01c3f45f89f0db96bc374f1e378deb1/src/macros.rs#L2
然后使用方法如下:
// https://github.com/crossterm-rs/crossterm/blob/0b4a06a97fd946dbe11d6eaa9b5db0b319bfb555/src/style.rs#L384
csi!("0m")  // ESC [0m, 恢复正常
// https://github.com/redox-os/termion/blob/8054e082b01c3f45f89f0db96bc374f1e378deb1/src/color.rs#L53
csi!("38;5;", $value, "m") // ESC [38;5;$valuem, 设置前景色

println!(
    "{}{}Hello, color!{}",
    csi!("38;5;", 2, "m"),
    csi!("48;5;", 0, "m"),
    csi!("0m")
);  // 黑色背景,绿色文字的显示效果
这里宏的参数列表出现了一个新的语法:$(...),*。意思是按照括号内的方式匹配零个或多个参数。这里的参数是 $( $l:expr ),*,在宏里面引用匹配到的参数时的用法也类似,是 $( $l ),*。(如果把 * 换成 +,就是匹配一个到多个参数)
而 concat 就是把字面量连接起来成为字符串的宏。
函数的默认值
在很多语言里,函数都可以有一个「默认参数」:
def func(a, b, k=1):
	return a + b * k
但是 Rust 的函数不支持默认参数,当然可以这么写:
fn func(a: i32, b: i32, k: Option<i32>) -> i32 {
    let k = k.unwrap_or(1);
    a + b * k
}
但是用宏可以给用户提供更方便的接口:
macro_rules! func {
    ($a: expr, $b: expr) => {
        func($a, $b, None)
    };
    ($a: expr, $b: expr, $k: expr) => {
        func($a, $b, Some($k))
    }
}

println!("{} {}", func!(1, 2, 3), func!(1, 2));
// println!("{} {}", func(1, 2, Some(3)), func(1, 2, None));
这里的宏定义可以重载(overload):在编译的时候,编译器会选择合适的方法来进行代码替换。
链表
链表是非常常见的数据结构。尽管有人会这么辩解:
- 链表对 cache 不友好,对内存的随机访问导致局部性很差
- 链表占用的空间比数组/vector 更大(要存储 pointer)
- 对于很多 workload,把链表换成数组/vector 不会带来明显的性能损失
但是无法回避的是,有的时候就是要用链表,而且 Rust 里面写链表很难(尤其是双端队列,需要与 borrow checker 以非常扭曲的方式搏斗),很多时候不得不与 unsafe 做妥协(说到这个,甚至是标准库的 vec 也还是需要 unsafe 去实现)。关于如何写链表,Learn Rust With Entirely Too Many Linked Lists 有着很详细的描述,以下仅对「另一种链表实现」做一个简单的介绍(只写单向链表,并且尽量不要把下面的代码直接用在生产环境上)。
std::collections::LinkedList 不也挺好吗?
答:接口(https://doc.rust-lang.org/std/collections/struct.LinkedList.html)不好用。
不能在链表中间插入元素。也不能在有链表元素的所有权的时候直接指定删除链表中的该元素。是有个remove(),但是它还是 nightly 特性,而且要把整个链表重新遍历一遍。
如果 LinkedList 不能满足需要,那只能自己重新实现了。
^ 我本来是这么认为的,然后写下面的内容写到一半的时候找资料,发现 LinkedList 有 CursorMut 可以实现上面提到的事情,所以挺好的,只要你愿意开 nightly 特性(CursorMut 能够随意移动、插入删除)。
大部分都是 Safe 的伪链表
在一般的印象里,链表的结构应该是这样子的:
// C 类伪代码

struct node {
    T value;
    node* next;
}

struct llist {
    node *head;
}
但是如果把内存指针换成数组的 index 会怎么样呢?(我记得我是高中时候在紫书(《算法竞赛入门经典》)第二章开头看到过这种写法的,当时还在想「居然还能这样」)
// C 类伪代码

struct llist {
    int head;
    vector<T> value;
    vector<int> next;
}
可以发现,这里就省去了很多 borrowing 的难题(因为没有指来指去的内存指针了!但是后面也带来了新的问题),相应的,我们的代码需要自己保证维护正确的链表状态。
为了简化代码,假设链表的最大长度(capacity)为定值,并且假设用户自己检查链表是否已满。
首先写 Node 和链表的结构体,以及新建链表、在表头 push/pop 的代码:
#[derive(Debug)]
struct Node<T> {
    value: T,
    next: Option<usize>,
}

#[derive(Debug)]
pub struct LinkedList<T> {
    head: Option<usize>,
    nodes: Vec<Option<Node<T>>>,
    free: Vec<usize>,
    len: usize,
    capacity: usize,
}

impl<T> LinkedList<T>
{
    pub fn new(capacity: usize) -> Self {
        let mut free = vec![];
        for i in 0..capacity {
            free.push(i);
        }
        let mut nodes = vec![];
        for _ in 0..capacity {
            nodes.push(None);
        }
        LinkedList {
            head: None,
            nodes,
            len: 0,
            free,
            capacity,
        }
    }

    pub fn push_front(&mut self, value: T) {
        assert!(self.len < self.capacity);
        let node = Node {
            value,
            next: self.head,
        };
        let free_index = self.free.pop().unwrap();
        self.nodes[free_index] = Some(node);
        self.head = Some(free_index);
        self.len += 1;
    }

    pub fn pop_front(&mut self) -> Option<T> {
        if self.len == 0 {
            return None;
        }
        let original_head = self.head.unwrap();
        let node = self.nodes[original_head].take().unwrap();
        self.head = node.next;
        self.len -= 1;
        self.free.push(original_head);
        Some(node.value)
    }
}
-
free存储「空闲节点」的 index,用来快速找到可用的 index。 - 定义的时候使用到了 Rust 的泛型,便于存储不同类型的值。
-
不用
vec![None; capacity]作为nodes的值,是因为vec!要求Option<Node<T>>是可以 clone 的,但是 T 不一定有Clonetrait。vec!的代码:// macros.rs macro_rules! vec { // ... ($elem:expr; $n:expr) => ( $crate::__rust_force_expr!($crate::vec::from_elem($elem, $n)) ); // ... } // vec/mod.rs pub fn from_elem<T: Clone>(elem: T, n: usize) -> Vec<T> { <T as SpecFromElem>::from_elem(elem, n, Global) }这里
elem需要实现Clonetrait。 -
pub代表对应的结构体/方法可以暴露给其他的模块。
于是我们可以写这样的测试代码(参考 https://doc.rust-lang.org/book/ch11-01-writing-tests.html):
#[cfg(test)]
mod tests {
    use crate::LinkedList;

    #[test]
    fn push_and_pop_front() {
        let mut llist = LinkedList::<i32>::new(4);
        llist.push_front(1);
        llist.push_front(2);
        llist.push_front(3);
        llist.push_front(4);
        assert_eq!(llist.pop_front(), Some(4));
        assert_eq!(llist.pop_front(), Some(3));
        assert_eq!(llist.pop_front(), Some(2));
        assert_eq!(llist.pop_front(), Some(1));
    }
}
但是光能在开头 push/pop 的链表是远远无法满足我们的欲望的。首先,我们还需要能够迭代链表中的内容——需要实现一个迭代器。
数据结构的迭代器实现思路是(以下介绍 Iter,IntoIter 也类似):
- 添加结构
Iter,存储迭代时必要的状态信息,链表结构体的iter()方法返回Iter结构。 - 结构
Iter实现 traitIterator。
那么我们首先来实现 IntoIter。如果去翻 too many linked lists,会发现它是这么实现 IntoIter 的:
pub struct IntoIter<T>(List<T>);

impl<T> List<T> {
    pub fn into_iter(self) -> IntoIter<T> {
        IntoIter(self)
    }
}

impl<T> Iterator for IntoIter<T> {
    type Item = T;
    fn next(&mut self) -> Option<Self::Item> {
        // access fields of a tuple struct numerically
        self.0.pop()
    }
}
直接 pop?感觉上讲,把所有权让出来就需要把元素从 collection 里面拽出来,但是对着 vec 去 for 循环的时候好像元素还在 vec 里面,所以我们来看一下:
-
vec 的
IntoIterator有三种不同的实现:impl<'a, T, A> IntoIterator for &'a Vec<T, A> // type Item = &'a T impl<'a, T, A> IntoIterator for &'a mut Vec<T, A> // type Item = &'a mut T impl<T, A> IntoIterator for Vec<T, A> // type Item = T分别对应以下三种情况:
for x in &vec {
    // x: &T
}
for x in &mut vec {
    // x: &mut T
}
for x in vec {
    // x: T
}
对应最后一种实现就是我们之前看到的
into_iter()的表现。 -
「那我 for 的时候好像也没啥问题啊?」,但是实际上在循环结束之后,对应的 vec 就不能再使用了:
// 编译不通过!
let x = vec![1, 2, 3, 4, 5];
for _ in x { }
println!("{:?}", x);
$ cargo build Compiling linkedlist-safefake v0.1.0 (/path/to/naive-rust-examples/linkedlist-safefake) error[E0382]: borrow of moved value: `x` --> src/lib.rs:141:26 | 139 | let x = vec![1, 2, 3, 4, 5]; | - move occurs because `x` has type `Vec<i32>`, which does not implement the `Copy` trait 140 | for _ in x { } | - | | | `x` moved due to this implicit call to `.into_iter()` | help: consider borrowing to avoid moving into the for loop: `&x` 141 | println!("{:?}", x); | ^ value borrowed here after move | note: this function takes ownership of the receiver `self`, which moves `x`
所以这里的实现没有问题。IntoIter 也是最容易实现的迭代器,只要不动脑子 pop 就行了:
pub struct IntoIter<T> {
    llist: LinkedList<T>,
}

// ignoring std::iter::IntoIterator for simplicity
#[allow(clippy::should_implement_trait)]
impl<T> LinkedList<T> {
    pub fn into_iter(self) -> IntoIter<T> {
        IntoIter { llist: self }
    }
}

impl<T> Iterator for IntoIter<T> {
    type Item = T;

    fn next(&mut self) -> Option<Self::Item> {
        self.llist.pop_front()
    }
}
(emmmm 其实最好能够给 LinkedList 实现 std::iter::IntoIterator trait,但是为了简单化考虑就忽略了)
第二个要实现的是 Iter,成品长这个样子:
pub struct Iter<'a, T: 'a> {
    llist: &'a LinkedList<T>,
    next: Option<usize>,
}

impl<T> LinkedList<T> {
    pub fn iter(&self) -> Iter<T> {
        Iter {
            llist: self,
            next: self.head,
        }
    }
}

impl<'a, T> Iterator for Iter<'a, T> {
    type Item = &'a T;

    fn next(&mut self) -> Option<Self::Item> {
        match self.next {
            None => None,
            Some(next) => {
                let node = self.llist.nodes[next].as_ref().unwrap();
                self.next = node.next;
                Some(&node.value)
            }
        }
    }
}
Iter 结构体内存储链表的引用和 next(下一个节点的信息)。这里的 lifetime 'a 是不得不添加的:它确保了 Iter 的生命周期和链表本体是一致的,由于 Iterator 返回的是引用,所以 type Item 也要加上 lifetime 'a。
在 next() 中的 as_ref() 是 Option 的一个方法:self.llist.nodes[next] 的类型是 &Option<Node<T>>,而 &Option 没法直接 unwrap(),as_ref() 的作用就是把 &Option<T> 弄成 Option<&T>。
最后一个是 IterMut。哦,这个我懂,把 & 全改成 &mut 就行了嘛:
// 编译不通过!
pub struct IterMut<'a, T: 'a> {
    llist: &'a mut LinkedList<T>,
    next: Option<usize>,
}

impl<T> LinkedList<T> {
    pub fn iter_mut(&mut self) -> IterMut<T> {
        IterMut {
            llist: self,
            next: self.head,
        }
    }
}

impl<'a, T> Iterator for IterMut<'a, T> {
    type Item = &'a mut T;

    fn next(&mut self) -> Option<Self::Item> {
        match self.next {
            None => None,
            Some(next) => {
                let node = self.llist.nodes[next].as_mut().unwrap();
                self.next = node.next;
                Some(&mut node.value)
            }
        }
    }
}
$ cargo build
   Compiling linkedlist-safefake v0.1.0 (/Users/tao/Projects/naive-rust-examples/linkedlist-safefake)
error[E0495]: cannot infer an appropriate lifetime for lifetime parameter in function call due to conflicting requirements
   --> src/lib.rs:237:28
    |
237 |                 let node = self.llist.nodes[next].as_mut().unwrap();
    |                            ^^^^^^^^^^^^^^^^^^^^^^
    |
note: first, the lifetime cannot outlive the anonymous lifetime defined on the method body at 233:13...
   --> src/lib.rs:233:13
    |
233 |     fn next(&mut self) -> Option<Self::Item> {
    |             ^^^^^^^^^
note: ...so that reference does not outlive borrowed content
   --> src/lib.rs:237:28
    |
237 |                 let node = self.llist.nodes[next].as_mut().unwrap();
    |                            ^^^^^^^^^^^^^^^^
note: but, the lifetime must be valid for the lifetime `'a` as defined on the impl at 230:6...
   --> src/lib.rs:230:6
    |
230 | impl<'a, T> Iterator for IterMut<'a, T> {
    |      ^^
note: ...so that the types are compatible
   --> src/lib.rs:233:46
    |
233 |       fn next(&mut self) -> Option<Self::Item> {
    |  ______________________________________________^
234 | |         match self.next {
235 | |             None => None,
236 | |             Some(next) => {
...   |
241 | |         }
242 | |     }
    | |_____^
    = note: expected `Iterator`
               found `Iterator`

For more information about this error, try `rustc --explain E0495`.
error: could not compile `linkedlist-safefake` due to previous error
哈?如果看过 https://rust-unofficial.github.io/too-many-lists/second-iter-mut.html 的话可能可以大致知道原因。
在 Iter 的实现中,输入与输出的 lifetime 无关:
impl<'a, T> Iterator for Iter<'a, T> {
    // 相当于……
    fn next<'b>(&'b mut self) -> Option<&'a T> {
        // ...
    }
}
但在 next() 中,我们返回的是 'b 的 self 中项的引用,而 'b 比 'a 小,看起来会出问题……但是一个关键点是,不可变引用是可以复制的(有多少不可变引用都没关系),但是可变引用是不能复制的(两个人同时拿着一个变量的可变引用是会出大问题的)。
在 too many linked lists 的例子里,IterMut 的 next() 可以安全实现,一个原因是 IterMut 不需要整个链表对象的可变引用,但是这里不行:borrow checker 处理不了引用数组/vector 中某一项时的情况,会当成引用了整个数组/vector 来处理。于是……我们只能……
UNSAFE!
impl<'a, T> Iterator for IterMut<'a, T> {
    type Item = &'a mut T;

    fn next(&mut self) -> Option<Self::Item> {
        match self.next {
            None => None,
            Some(next) => {
                // let mut node = self.nodes[next].as_mut().unwrap();
                // self.next = node.next;
                // Some(&mut node.value)
                let node = &mut self.llist.nodes[next];
                let node = node.as_mut().unwrap();
                self.next = node.next;
                let value_ptr = &mut node.value as *mut T;
                unsafe { Some(&mut *value_ptr as &mut T) }
            }
        }
    }
}
(至少从我看来,这个 IterMut 每次 next() 不可能会得到相同的元素,于是不可能出现一个元素同时有两个可变引用,所以这个代码虽然 unsafe,但是是 “sound”(可靠)的)
这里取 node.value 的可变引用作为可变的裸指针:
let value_ptr = &mut node.value as *mut T;
取引用的裸指针是安全的。但是解引用裸指针就不安全了:
unsafe { Some(&mut *value_ptr as &mut T) }
解引用 value_ptr 之后(*value_ptr)取它的可变引用,然后类型转换为 &mut T,和返回值一致。
在实现了三种迭代器后,我们可以写代码来测试:
fn init_llist() -> LinkedList<i32> {
    let mut llist = LinkedList::new(10);
    llist.push_front(1);
    llist.push_front(2);
    llist.push_front(3);
    // 3 -> 2 -> 1
    llist
}

#[test]
fn iter() {
    let llist = init_llist();
    let mut iter = llist.iter();
    assert_eq!(iter.next(), Some(&3));
    assert_eq!(iter.next(), Some(&2));
    assert_eq!(iter.next(), Some(&1));
    assert_eq!(iter.next(), None);
}

#[test]
fn into_iter() {
    let llist = init_llist();
    let mut iter = llist.into_iter();
    assert_eq!(iter.next(), Some(3));
    assert_eq!(iter.next(), Some(2));
    assert_eq!(iter.next(), Some(1));
    assert_eq!(iter.next(), None);
}

#[test]
fn iter_mut() {
    let mut llist = init_llist();
    for i in llist.iter_mut() {
        *i += 1;
    }
    let mut iter = llist.iter_mut();
    assert_eq!(iter.next(), Some(&mut 4));
    assert_eq!(iter.next(), Some(&mut 3));
    assert_eq!(iter.next(), Some(&mut 2));
    assert_eq!(iter.next(), None);
}
最后,我们希望实现的一个特性是在迭代的同时可以自由插入/删除元素。先在 LinkedList 上准备好相关代码:
fn insert_next_at(&mut self, current: Option<usize>, value: T) {
    assert!(self.len < self.capacity);
    let next = match current {
        None => self.head,
        Some(current) => self.nodes[current].as_ref().unwrap().next,
    };
    let node = Node { value, next };
    let free_index = self.free.pop().unwrap();
    self.nodes[free_index] = Some(node);
    match current {
        None => self.head = Some(free_index),
        Some(current) => {
            self.nodes[current].as_mut().unwrap().next = Some(free_index);
        }
    }
    self.len += 1;
}

fn remove_next_at(&mut self, current: Option<usize>) -> Option<T> {
    let next = match current {
        None => self.head,
        Some(current) => self.nodes[current].as_ref().unwrap().next,
    };
    match next {
        None => None,
        Some(next) => {
            let node = self.nodes[next].take().unwrap();
            self.len -= 1;
            self.free.push(next);
            match current {
                None => self.head = node.next,
                Some(current) => {
                    self.nodes[current].as_mut().unwrap().next = node.next;
                }
            }
            Some(node.value)
        }
    }
}
current 为 None 时,认为「当前位置」是一个指向表头的「幽灵元素」。于是 push_front 和 pop_front 的实现也可以简化:
pub fn push_front(&mut self, value: T) {
    self.insert_next_at(None, value)
}

pub fn pop_front(&mut self) -> Option<T> {
    self.remove_next_at(None)
}
之后是 API 的设计,直觉上迭代器应该作为参数,但是首先没法把这个功能在 LinkedList 上实现:
pub fn insert_next(&mut self, iter: &mut IterMut<T>, value: T) {
    let current = iter.current;
    self.insert_next_at(current, value);
}

pub fn remove_next(&mut self, iter: &mut IterMut<T>) -> Option<T> {
    let current = iter.current;
    self.remove_next_at(current)
}

let mut llist = init_llist();
let mut iter = llist.iter_mut();
// 编译不通过!
llist.insert_next(iter, 1);
因为 llist.iter_mut(); 得到的 IterMut 中有对 llist 的可变引用,但是调用 llist.insert_next 又需要一个对它的可变引用,这是违反规则的。
那既然 IterMut 迭代器本体有可变引用,那么这个方法放在迭代器上行不行呢?可以是可以,但是得到的玩意儿用起来会很违背直觉。
impl<'a, T> IterMut<'a, T> {
    pub fn insert_next_next(&mut self, value: T) {
        let next = self.next;
        self.llist.insert_next_at(next, value);
    }
    pub fn remove_next_next(&mut self) -> Option<T> {
        let next = self.next;
        self.llist.remove_next_at(next)
    }
}

let mut llist = init_llist();
let mut iter = llist.iter_mut();
assert_eq!(iter.next(), Some(&mut 3));
// OK,我想在 3 后面插入一个 10
iter.insert_next_next(10);
// ??????
assert_eq!(iter.next(), Some(&mut 2));
// ????????????
assert_eq!(iter.next(), Some(&mut 10));
当然,理论上讲迭代器里面可以多放点东西,比如多维护一个「当前节点」的信息,但是写起来感觉会很难受。既然 std 里的 linked list 有个 cursor,我们也来实现一个差不多的东西如何?(部分参考了 https://rust-unofficial.github.io/too-many-lists/sixth-cursors-impl.html)
首先是结构体定义,以及「向前移动」「看看当前值」和「看看下一个值」:
pub struct CursorMut<'a, T> {
    llist: &'a mut LinkedList<T>,
    current: Option<usize>,
}

impl<'a, T> CursorMut<'a, T> {
    pub fn move_next(&mut self) {
        match self.current {
            None => self.current = self.llist.head,
            Some(current) => {
                let node = self.llist.nodes[current].as_ref().unwrap();
                self.current = node.next;
            }
        }
    }

    pub fn current(&mut self) -> Option<&mut T> {
        match self.current {
            None => None,
            Some(current) => Some(&mut self.llist.nodes[current].as_mut().unwrap().value),
        }
    }

    pub fn peek_next(&mut self) -> Option<&mut T> {
        let next = match self.current {
            None => self.llist.head,
            Some(current) => self.llist.nodes[current].as_ref().unwrap().next,
        };
        match next {
            None => None,
            Some(next) => Some(&mut self.llist.nodes[next].as_mut().unwrap().value),
        }
    }
}
简单到难以置信:不需要 unsafe,不需要生命周期。设计上假设它是循环的:如果到链表最后一个元素,move_next 会把 current 设置为 None,再 move_next 就到了表头。
有人会吐槽:current 会返回可变引用,那么能不能搞出指向相同元素的多个可变引用呢?
// 编译不通过!
let mut llist = init_llist();
let mut cursor = llist.cursor_mut();
cursor.move_next();
let mut x = cursor.current().unwrap();
let mut y = cursor.current().unwrap();
*x += 1;
*y += 2;
答案是不会,因为 current() 需要 &mut self,于是 let mut y 那里就会编译出错。
接口用起来像这样:
#[test]
fn cursor() {
    let mut llist = init_llist();
    let mut cursor = llist.cursor_mut();
    assert_eq!(cursor.current(), None);
    assert_eq!(cursor.peek_next(), Some(&mut 3));
    cursor.move_next();
    assert_eq!(cursor.current(), Some(&mut 3));
    assert_eq!(cursor.peek_next(), Some(&mut 2));
    cursor.move_next();
    assert_eq!(cursor.current(), Some(&mut 2));
    assert_eq!(cursor.peek_next(), Some(&mut 1));
    cursor.move_next();
    assert_eq!(cursor.current(), Some(&mut 1));
    assert_eq!(cursor.peek_next(), None);
    cursor.move_next();
    assert_eq!(cursor.current(), None);
    assert_eq!(cursor.peek_next(), Some(&mut 3));
}
加个 insert_next 和 remove_next 也是小菜一碟:
pub fn insert_next(&mut self, value: T) {
    let current = self.current;
    self.llist.insert_next_at(current, value);
}

pub fn remove_next(&mut self) -> Option<T> {
    let current = self.current;
    self.llist.remove_next_at(current)
}
接口使用体验如下,比迭代器要舒服一些:
#[test]
fn cursor_insert_remove() {
    let mut llist = init_llist();
    let mut cursor = llist.cursor_mut();
    cursor.move_next();
    cursor.insert_next(4); // 3 -> 4 -> 2 -> 1
    assert_eq!(cursor.peek_next(), Some(&mut 4));
    cursor.move_next();
    assert_eq!(cursor.current(), Some(&mut 4));
    assert_eq!(cursor.remove_next(), Some(2));
    assert_eq!(cursor.remove_next(), Some(1));
    assert_eq!(cursor.remove_next(), None);
    cursor.move_next(); // "ghost start point"
    assert_eq!(cursor.remove_next(), Some(3));
    assert_eq!(cursor.remove_next(), Some(4));
    assert_eq!(cursor.remove_next(), None);
    assert_eq!(llist.len, 0);
}
番外篇:单线程下的 mutable singleton
因为我没去跑过 profiling,以下故事纯属虚构。
前面提到,随机数生成器需要用外部的 crate 实现,比如说 rand。
// 用起来大概像这个样子
let mut rng = rand::thread_rng();
let y: f64 = rng.gen();
但是我(为了写算法课概率算法的作业)出现了一个扭曲的需求:我有一些算法函数,它们的参数和返回值需要完全一致,但是有些函数是确定性算法,不需要 rng,有些函数是概率算法,需要 rng:
// O(n), deterministic algorithm
fn alg_a(x: i32, l: &StaticLinkedList) -> Option<usize> {
    // ...
}

// O(n), probabilistic algorithm
fn alg_d(x: i32, l: &StaticLinkedList) -> Option<usize> {
    // ...
}

// O(sqrt(n)), deterministic algorithm
fn alg_b(x: i32, l: &StaticLinkedList) -> Option<usize> {
    // ...
}

// O(sqrt(n)), probabilistic algorithm
fn alg_c(x: i32, l: &StaticLinkedList) -> Option<usize> {
    // ...
}
并且我需要为每个函数测运行时间,而且每个函数运行时间都很短,最后的测时不得不精确到 ns。(胡扯中,因为我完全没跑 profiling,丢人)每次初始化 rand::thread_rng() 恐怕都得 “seeded by the system”,从 ring3 到 ring0 至少得转几个回合吧,那岂不是劣势很大,生成随机数又要 &mut self,要能有一个全局的随机数生成器就好了。
本节部分参考了 https://matklad.github.io/2020/10/03/fast-thread-locals-in-rust.html。
以下示例结构体实现如下(简化问题,这个当然不是随机数生成器):
pub struct Singleton {
    state: u64
}

impl Singleton {
    pub fn new(state: u64) -> Self {
        Singleton {
            state
        }
    }

    pub fn get(&mut self) -> u64 {
        self.state = (self.state * self.state) ^ self.state;
        self.state
    }
}
RefCell 与 thread_local!
前面也提到,static mut 是 unsafe 的,那么就像 Mutex 有「内部可变性」一样,有没有什么给单线程环境使用的有「内部可变性」的结构呢?答案是 RefCell。
让我们先来试试:
#[macro_use]
extern crate lazy_static;

use std::cell::RefCell;
use mutable_singleton::Singleton;

lazy_static! {
    static ref SINGLETON: RefCell<Singleton> = RefCell::new(Singleton::new(2));
}

fn main() {

}
结果不行:
$ cargo run
   Compiling mutable-singleton v0.1.0 (/path/to/naive-rust-examples/mutable-singleton)
error[E0277]: `RefCell<Singleton>` cannot be shared between threads safely
  --> src/bin/thread_local_refcell.rs:7:1
   |
7  | / lazy_static! {
8  | |     static ref SINGLETON: RefCell<Singleton> = RefCell::new(Singleton::new(2));
9  | | }
   | |_^ `RefCell<Singleton>` cannot be shared between threads safely
   |
   = help: the trait `Sync` is not implemented for `RefCell<Singleton>`
note: required by a bound in `lazy_static::lazy::Lazy`
  --> /path/to/.cargo/registry/src/<redacted>/lazy_static-1.4.0/src/inline_lazy.rs:19:20
   |
19 | pub struct Lazy<T: Sync>(Cell<Option<T>>, Once);
   |                    ^^^^ required by this bound in `lazy_static::lazy::Lazy`
   = note: this error originates in the macro `__lazy_static_create` (in Nightly builds, run with -Z macro-backtrace for more info)

For more information about this error, try `rustc --explain E0277`.
error: could not compile `mutable-singleton` due to previous error
必须要 Sync,但是为此改成 Mutex 也太荒谬了一些。不过我们有一个线程自己的空间:TLS(Thread Local Storage)。对应可以用 thread_local! 初始化:
thread_local! {
    static SINGLETON: RefCell<Singleton> = RefCell::new(Singleton::new(2));
}
为了调用 TLS 里面的变量,需要用这样的语法:
SINGLETON.with(|s| s.borrow_mut().get())
加上测时功能,最后我们非常 safe 的代码长这样:
use std::{cell::RefCell, time::Instant};
use mutable_singleton::Singleton;

thread_local! {
    static SINGLETON: RefCell<Singleton> = RefCell::new(Singleton::new(2));
}

// 不要做 inline,因为我们需要测试 get_singleton() 函数本身的性能
#[inline(never)]
fn get_singleton() -> u64 {
    SINGLETON.with(|s| s.borrow_mut().get())
}

fn main() {
    let mut x = 0;
    const STEPS: i32 = 1000000000;
    let before = Instant::now();
    for _ in 0..STEPS {
        x = get_singleton();
    }
    println!("{}", x);
    println!("Time: {} ms", before.elapsed().as_millis());
}
执行结果:
$ cargo run --release --bin thread_local_refcell
   Compiling mutable-singleton v0.1.0 (/Users/tao/Projects/naive-rust-examples/mutable-singleton)
    Finished release [optimized] target(s) in 1.17s
     Running `target/release/thread_local_refcell`
14292512616797437954
Time: 4625 ms
实话讲,好像有点儿慢。
惰性求值,坏
能不能更快一点呢?我们可以把代码往 compiler explorer 里丢过去看看生成出来的汇编长啥样子(https://godbolt.org/z/6f6YWMbbM)
example::get_singleton:
        push    rax
        lea     rdi, [rip + example::SINGLETON::__getit::__KEY@TLSLD]
        call    __tls_get_addr@PLT
        cmp     qword ptr [rax + example::SINGLETON::__getit::__KEY@DTPOFF], 0
        je      .LBB5_2
        lea     rax, [rax + example::SINGLETON::__getit::__KEY@DTPOFF+8]
        jmp     .LBB5_3
.LBB5_2:
        call    std::thread::local::fast::Key<T>::try_initialize
        test    rax, rax
        je      .LBB5_5
.LBB5_3:
        cmp     qword ptr [rax], 0
        jne     .LBB5_4
        mov     rdx, qword ptr [rax + 8]
        mov     rcx, rdx
        imul    rcx, rdx
        xor     rcx, rdx
        mov     qword ptr [rax + 8], rcx
        mov     qword ptr [rax], 0
        mov     rax, rcx
        pop     rcx
        ret
.LBB5_4:
        lea     rdi, [rip + .L__unnamed_1]
        lea     rcx, [rip + .L__unnamed_2]
        lea     r8, [rip + .L__unnamed_3]
        mov     rdx, rsp
        mov     esi, 16
        call    qword ptr [rip + core::result::unwrap_failed@GOTPCREL]
        ud2
.LBB5_5:
        lea     rdi, [rip + .L__unnamed_4]
        lea     rcx, [rip + .L__unnamed_5]
        lea     r8, [rip + .L__unnamed_6]
        mov     rdx, rsp
        mov     esi, 70
        call    qword ptr [rip + core::result::unwrap_failed@GOTPCREL]
        ud2
啊,可以看到绝大部分……都不是计算代码。每次访问 TLS 里面的值,都要 std::thread::local::fast::Key<T>::try_initialize 一遍,之后 RefCell 看起来也要检查一遍是否有多个可变引用。
每次访问都要尝试初始化,是因为 thread_local! 是惰性求值的,并且由于访问 TLS 的部分套在函数里面,即使有优化也不太容易做。换成 lazy_static! 也不会有什么成效(而且我测试过会更慢)。
不过好消息是 RefCell::new 是 const fn,所以我们可以换成 static mut:
static mut SINGLETON: RefCell<Singleton> = RefCell::new(Singleton{ state: 2 });
(需要把 state 暴露为 pub)
然后读值的函数可以改成这样:
fn get_singleton() -> u64 {
    unsafe {
        SINGLETON.borrow_mut().get()
    }
}
再跑个分看看:
$ cargo run --release --bin unsafe_refcell
    Finished release [optimized] target(s) in 0.01s
     Running `target/release/unsafe_refcell`
14292512616797437954
Time: 3492 ms
成效很大。
如果现在去看 compiler explorer 的汇编,可以发现优化后的 get_singleton 已经没有 RefCell 的检测代码了,但是 compiler explorer 的环境还是稍微有点不同(作为 library 编译而不是作为 binary 编译),所以有必要看看本地的汇编长啥样。
参考 https://stackoverflow.com/questions/39219961/how-to-get-assembly-output-from-building-with-cargo
$ cargo rustc --release --bin unsafe_refcell -- --emit asm
   Compiling mutable-singleton v0.1.0 (/path/to/naive-rust-examples/mutable-singleton)
    Finished release [optimized] target(s) in 1.48s
然后一看汇编,诶?
__ZN14unsafe_refcell13get_singleton17h6eb17ac91dc81eeaE:
Lfunc_begin0:
	.cfi_startproc
	.cfi_personality 155, _rust_eh_personality
	.cfi_lsda 16, Lexception0
	pushq	%rbp
	.cfi_def_cfa_offset 16
	.cfi_offset %rbp, -16
	movq	%rsp, %rbp
	.cfi_def_cfa_register %rbp
	pushq	%rbx
	pushq	%rax
	.cfi_offset %rbx, -24
	cmpq	$0, __ZN14unsafe_refcell9SINGLETON17h88c5dcf868329760E(%rip)
	jne	LBB6_3
	movq	$-1, __ZN14unsafe_refcell9SINGLETON17h88c5dcf868329760E(%rip)
Ltmp0:
	leaq	__ZN14unsafe_refcell9SINGLETON17h88c5dcf868329760E+8(%rip), %rdi
	callq	__ZN17mutable_singleton9Singleton3get17h6fcf1a0fa3cd6caeE
Ltmp1:
	incq	__ZN14unsafe_refcell9SINGLETON17h88c5dcf868329760E(%rip)
	addq	$8, %rsp
	popq	%rbx
	popq	%rbp
	retq
LBB6_3:
	leaq	L___unnamed_2(%rip), %rdi
	leaq	l___unnamed_3(%rip), %rcx
	leaq	l___unnamed_4(%rip), %r8
	leaq	-16(%rbp), %rdx
	movl	$16, %esi
	callq	__ZN4core6result13unwrap_failed17hefa96ebaf26de4baE
LBB6_4:
Ltmp2:
	movq	%rax, %rbx
	leaq	__ZN14unsafe_refcell9SINGLETON17h88c5dcf868329760E(%rip), %rdi
	callq	__ZN4core3ptr75drop_in_place$LT$core..cell..RefMut$LT$mutable_singleton..Singleton$GT$$GT$17h34cad5c1b5c9ff9dE
	movq	%rbx, %rdi
	callq	__Unwind_Resume
RefCell 的逻辑分明还在呢。说明时间还有缩短的空间。
因为已经是 static mut 了,去掉 RefCell 很简单:
static mut SINGLETON: Singleton = Singleton { state: 2 };

#[inline(never)]
fn get_singleton() -> u64 {
    unsafe { SINGLETON.get() }
}
汇编如下:
__ZN16unsafe_staticmut13get_singleton17h1dc92cfabd31dd96E:
	.cfi_startproc
	pushq	%rbp
	.cfi_def_cfa_offset 16
	.cfi_offset %rbp, -16
	movq	%rsp, %rbp
	.cfi_def_cfa_register %rbp
	leaq	__ZN16unsafe_staticmut9SINGLETON17hff7110e0d2e7f2bcE(%rip), %rdi
	popq	%rbp
	jmp	__ZN17mutable_singleton9Singleton3get17h6fcf1a0fa3cd6caeE
	.cfi_endproc
检查的代码也消失了。执行时间看起来也不错:
$ cargo run --release --bin unsafe_staticmut
   Compiling mutable-singleton v0.1.0 (/Users/tao/Projects/naive-rust-examples/mutable-singleton)
    Finished release [optimized] target(s) in 0.99s
     Running `target/release/unsafe_staticmut`
14292512616797437954
Time: 2706 ms
未定义行为
「每次调用都要套个 unsafe 好麻烦啊,能不能直接 static SINGLETON 然后 unsafe 以 &self 修改 self.state?」
似乎我们可以这么实现:
pub fn get_unsafe(&self) -> u64 {
    let state = self.next_state();
    let sptr = &self.state as *const u64 as *mut u64;
    unsafe {
        std::ptr::write(sptr, state);
    }
    state
}
强硬把 const 指针转换成可变指针,然后写入数据。然后:
static SINGLETON: Singleton = Singleton { state: 2 };

#[inline(never)]
fn get_singleton() -> u64 {
    SINGLETON.get_unsafe()
}
执行结果看起来也……:
$ cargo run --release --bin unsafe_ub
    Finished release [optimized] target(s) in 0.00s
     Running `target/release/unsafe_ub`
[1]    19442 bus error  cargo run --release --bin unsafe_ub
算了 😅,还是写个宏吧。
这里要注意的是:
-
static分配的内存空间(很可能)不可写。 - 就算内存空间可写,把不可变引用转换成可变的指针然后写东西的行为是未定义的。这代表可能换个环境、换个编译器版本,程序的行为就变了。
UnsafeCell 是内部可变性的基础结构,但是这里也没法用它,因为它取消了 Sync trait 的实现,但是 static 要求内部元素可以跨线程。
最后的作业
(2022/5/17 added)
前面提到的方法的问题是,static mut 赋的右值必须是 const,但是你想使用的结构不一定能在编译期就初始化好:
// 编译不通过!
use rand::rngs::SmallRng;
use rand::SeedableRng;

// 因为 seed_from_u64 不是 const fn
// 所以即使「看起来」这个随机数生成器能够在编译期推断出结构的值
// 那也不行
static mut RNG: SmallRng = SmallRng::seed_from_u64(20380119);
我不想手写随机数生成器,所以得去找点别的办法。可以观察到,一个固定长度的数组是可以的:
static mut ARRAY: [u8; 23] = [0; 23];
而且我们可以在编译期获得 SmallRng 结构体的大小:
const SMALLRNG_SIZE: usize = std::mem::size_of::<SmallRng>();
所以我交上去的作业就长这样:
const SMALLRNG_SIZE: usize = std::mem::size_of::<SmallRng>();

struct Lrng {
    rng: [u8; SMALLRNG_SIZE],
}

impl Lrng {
    // 把初始化的事情放 main() 最开始做
    fn init(&mut self) {
        // 拿到 rng 可变指针,硬说它是 SmallRng 的可变指针
        let ptr = self.rng.as_mut_ptr() as *mut SmallRng;
        unsafe {
            // std::ptr::write 和直接 *ptr = xxx 应该都行
            std::ptr::write(ptr, SmallRng::from_entropy());
        }
    }

    fn gen_range(&mut self, high: usize) -> usize {
        let rng = unsafe {
            // std::ptr::read 做的事情事实上是……bitwise copy
            // 因为每次生成随机数都需要修改 rng 的内部状态,所以不能这么写,
            // 否则每次返回的相同范围的「随机数」都是一样的(
            // std::ptr::read(&self.rng as *const [u8; SMALLRNG_SIZE] as *const SmallRng)
            let ptr = self.rng.as_mut_ptr() as *mut SmallRng;
            // 对指针解引用之后返回 "rng" 的可变引用
            &mut *ptr
        };
        rng.gen_range(0..high)
    }
}

static mut RNG: Lrng = Lrng {
    rng: [0; SMALLRNG_SIZE],
};

macro_rules! gen_range {
    ($high:expr) => {
        unsafe { RNG.gen_range($high) }
    };
}

fn main() {
    // 初始化
    unsafe {
        RNG.init();
    }
    // ...
}
于是搞定。(当然了,生产环境不要写出这种代码,我只是糊个作业才这么做的)
后记
一门语言只有真正去使用它才有机会掌握,不管是自然语言还是编程语言都是如此。多写、多搜索,尝试理解,完成项目之后别忘了用 cargo clippy 和 cargo fmt 检查代码风格。
另外我的草稿是在 Notion 上写的,但是它的性能真的太拉垮了:文档一变长,拼音敲完之后按空格,要将近十秒才能上屏,我下次还是直接用 VS Code 写 markdown 得了。
最后,感谢 @myl7 和 @zzh1996 对本文初稿提供的建议。以上的内容由于我个人水平限制,可能存在一定的偏差,也欢迎指出其中的错误。
-
emmm 事实上,可以肯定 Rust 开发组里有《魔法少女小圆》的忠实粉丝。去 https://github.com/rust-lang/rust 里搜索看看就能看到测试代码里有多少 madoka 了。以及在 17 年的时候,甚至在错误 E0432 的解释里也有
homura::Madoka(当然现在没有了)。我写的时候一直想玩这个梗,终于在这里用上了( ↩
Comments